After installing VCF 9.0 it was time to setup the Supervisor cluster. This would give me VKS, vSphere Kubernets Service, what we earlier called Tanzu.
To do this i had some pre-requisites and some options. What network to use, meaning VPC, NSX or VDS.
By choosing this i soon found out that i had to fix some more pre-requisites.
I used an article from William Lam for inspiration, where he activated “NSX on DVPGs which will enable the VDS to accept traffic from NSX Edge and thus allowing us to select shared VLAN for both NSX and ESX Host Tunnel Endpoint Protocol (TEP)”. I will not do that. My main purpose with the setup was to gain more experience with VPC and how to use it with K8s.
Link to his article here.
Based on the requirements in the installation and some testing i needed a separate external connection:
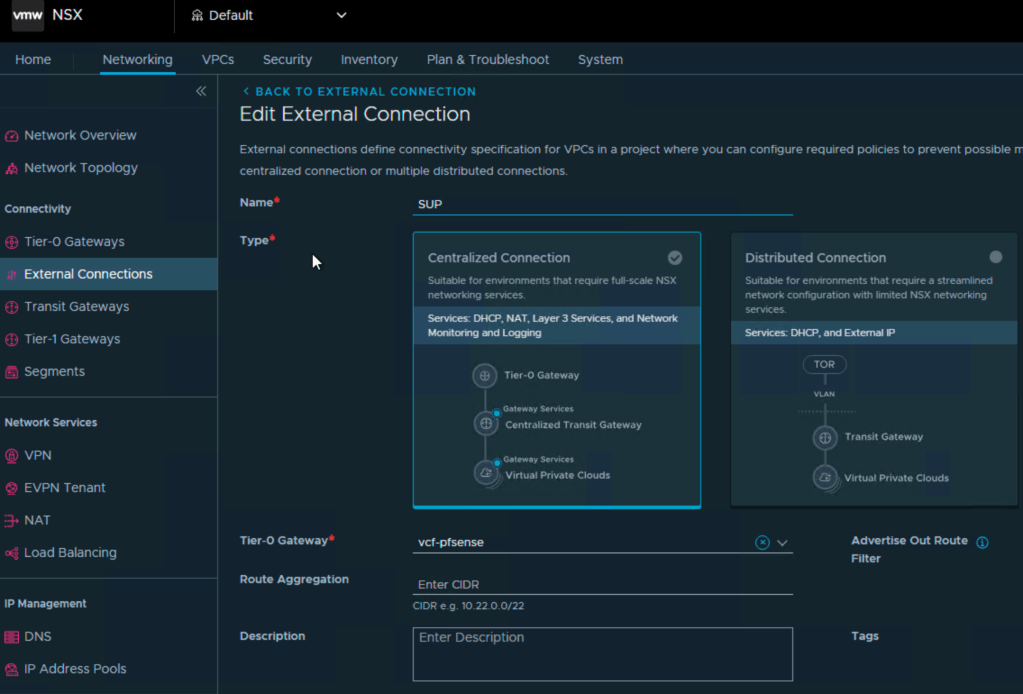
In the default project you have a default external connection, and that is used for your OTHER vpc`s , and the reason for this is that they have different ip blocks, and i did not want to mix them.
Next was to create a new project in NSX.
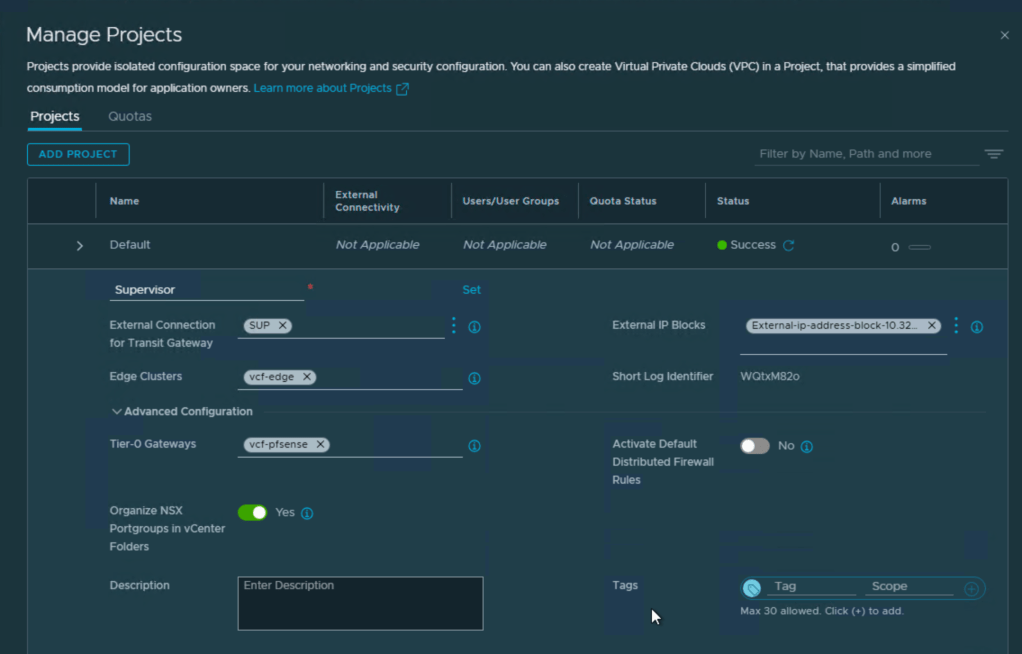
Here you connect the external connection you created in the previous step, the external IP block, connection to edge cluster and T0, but also the option to separate it with folders in vcenter and add to DFW.
Then it was creation of a separate connectivity profile.
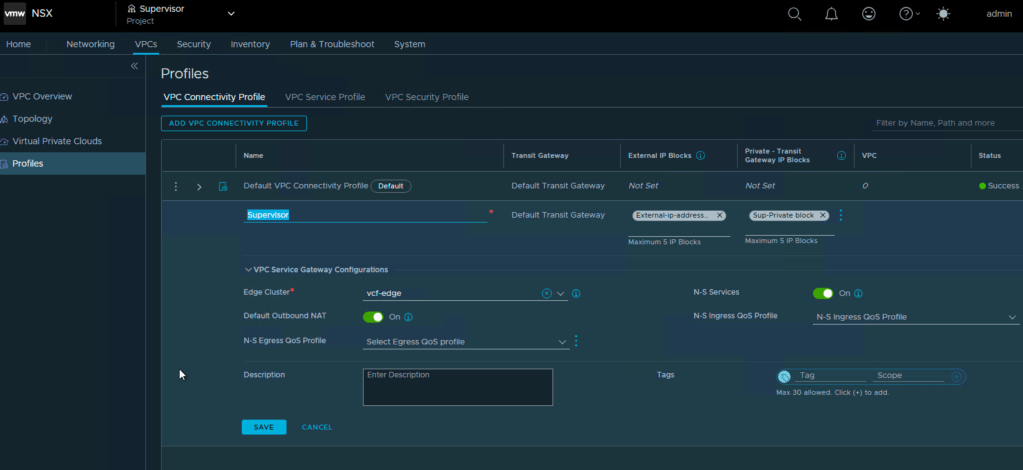
Next was editing the VPC Service Profile where i added DNS and NTP servers.
With this step ready i could then make my VKS workload VPC.
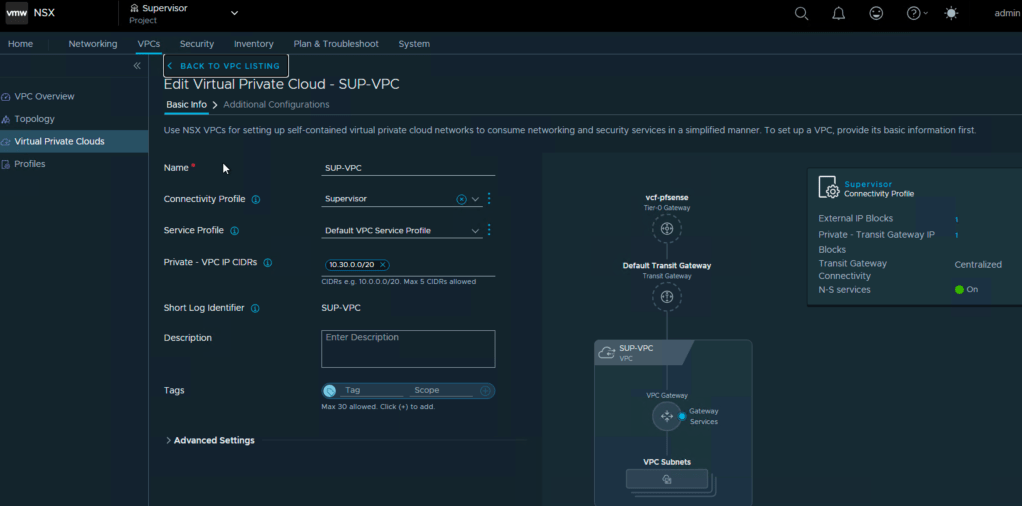
Here i added my new connectivity profile, used the default service profile . Private VPC IP CIDR is the internal network in the VPC, so i chose an ip block with /20 mask. If you then need to access a service in one of those subnets, you can assign an ip from the external ip block, so that you can reach it outside the VPC.
So now i have defined:
- External connection under networking in default project
- New NSX Project “Supervisor”
- New connectivity profile
- New Private Transit gateway ip block
- New External ip block
- Edited the service profile with dns and ntp.
- Created a VPC
- New Private VPC IP block
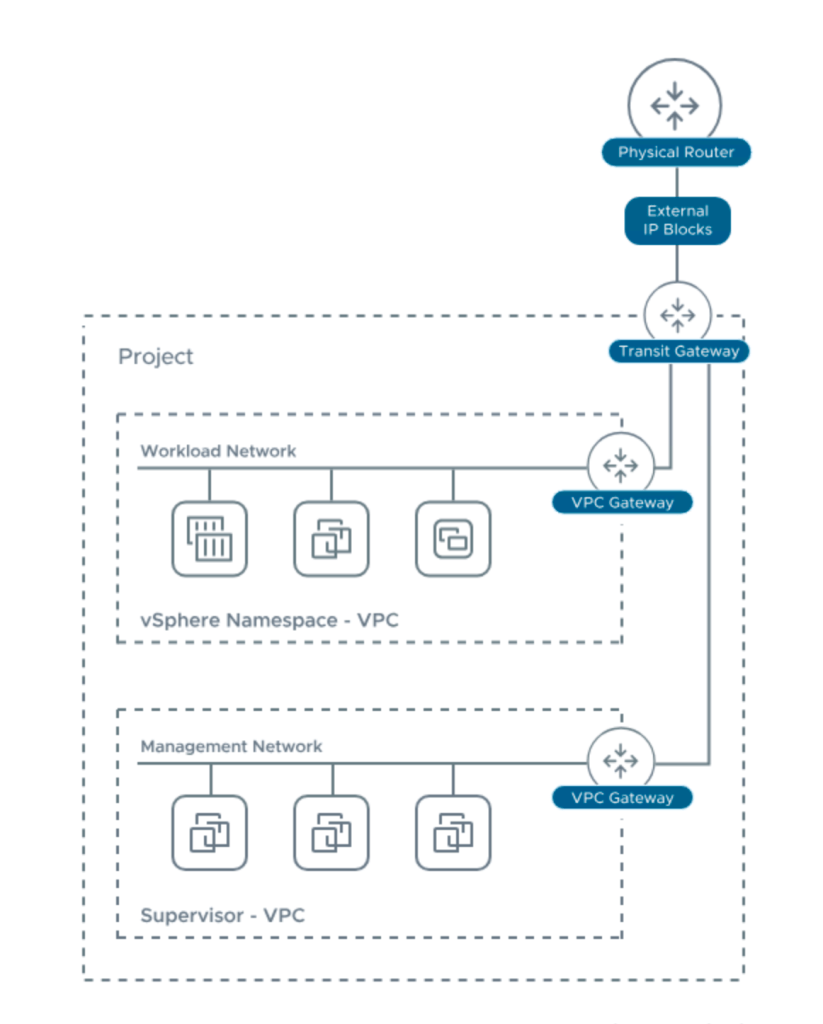
Now we have covered the most of the network for the supervisor, but we need mgmt and we need VIP for the loadbalancer.
The mgmt needs to be routable and connected to your esxi/vcenter, so instead of making a new vlan, defining it in the trunk on the physical switches and creating an interface in the firewall , setting up rules, i did the quickfix, and that was setting up a small mgmt subnett with a /28 mask, and defining it in the firewall as a virtual IP on the same interface as the rest of the mgmt. This gave me instant routing to these ip`s for the supervisors.
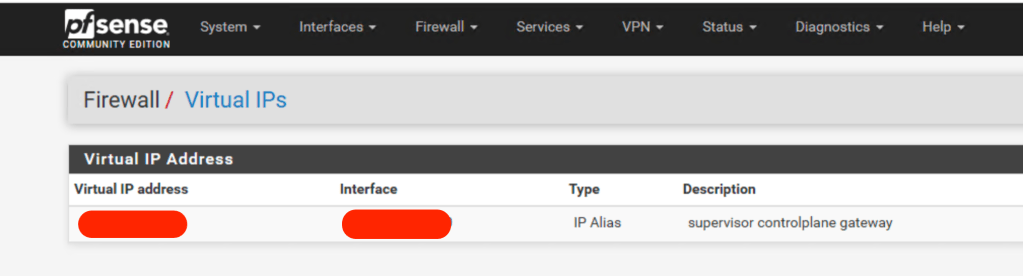
If you have more patience, please do the vlan/trunk setup, but i wanted to proove my theory for the network setup, and test K8s.
Next up was the ip for the loadbalancer. This is automatically picked from the external ip block, so i had that covered.
So now i also had:
- Mgmt subnet for the supervisors
- Ip for the loadbalancer
As i wrote earlier, the reason for separating this is that IF you create this in the default project, where you also have other ip blocks for other VPC`s the profile will randomly pick from that for default outbound nat address.

So if i had i pod config where each pod had its own vpc, and picked from external ip blocks pr. pod, you could suddenly end up with a nat address in your supervisor vpc from one of those pod`s.
This way you isolate the traffic and separate ip blocks.
Now you can start the “activate Supervisor” by right clicking your cluster in the inventory in vcenter.
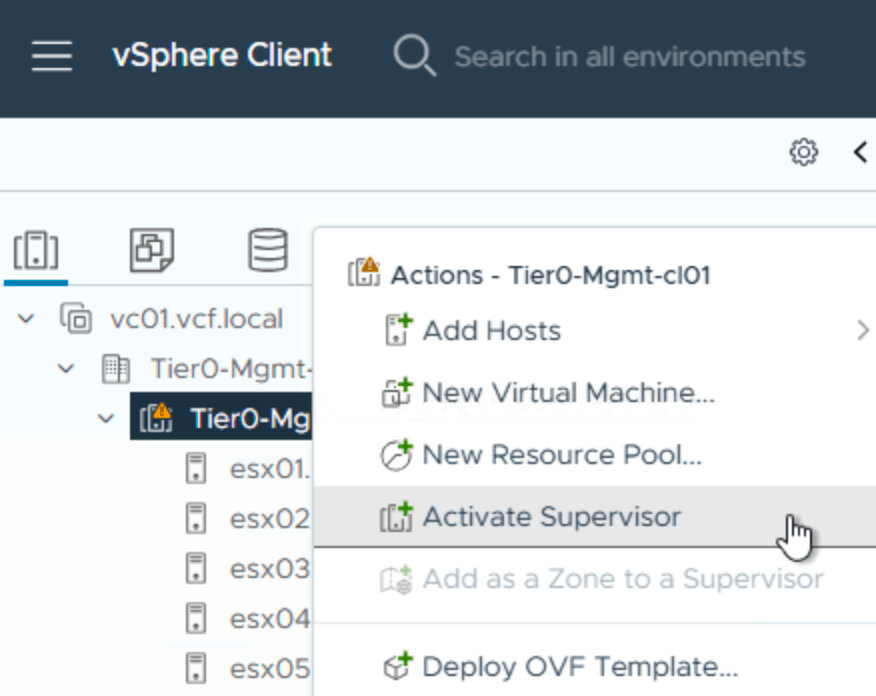
this will take you to this:
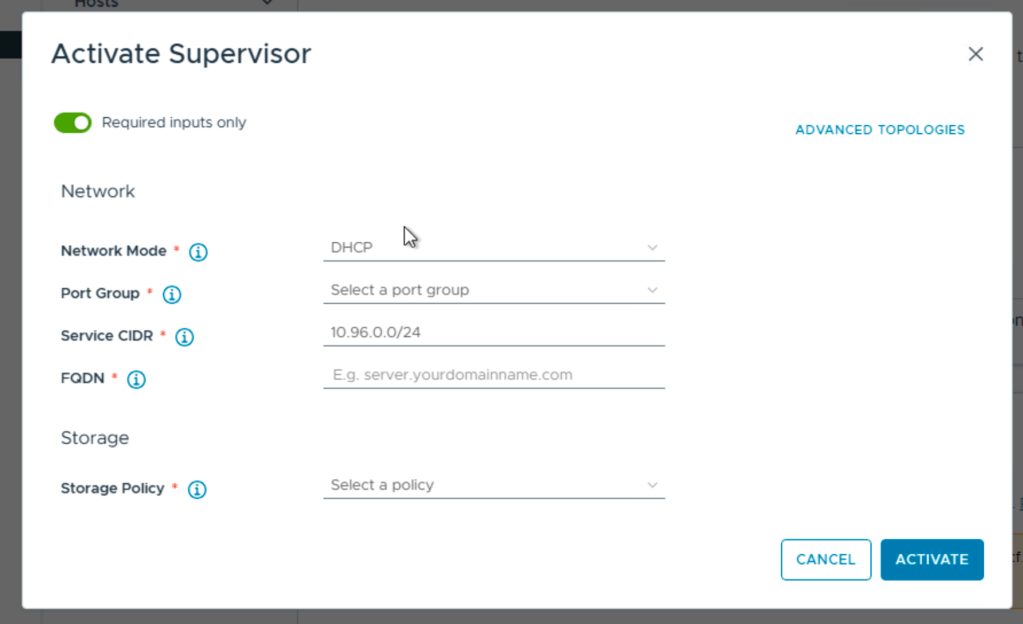
Choose advanced topologies:
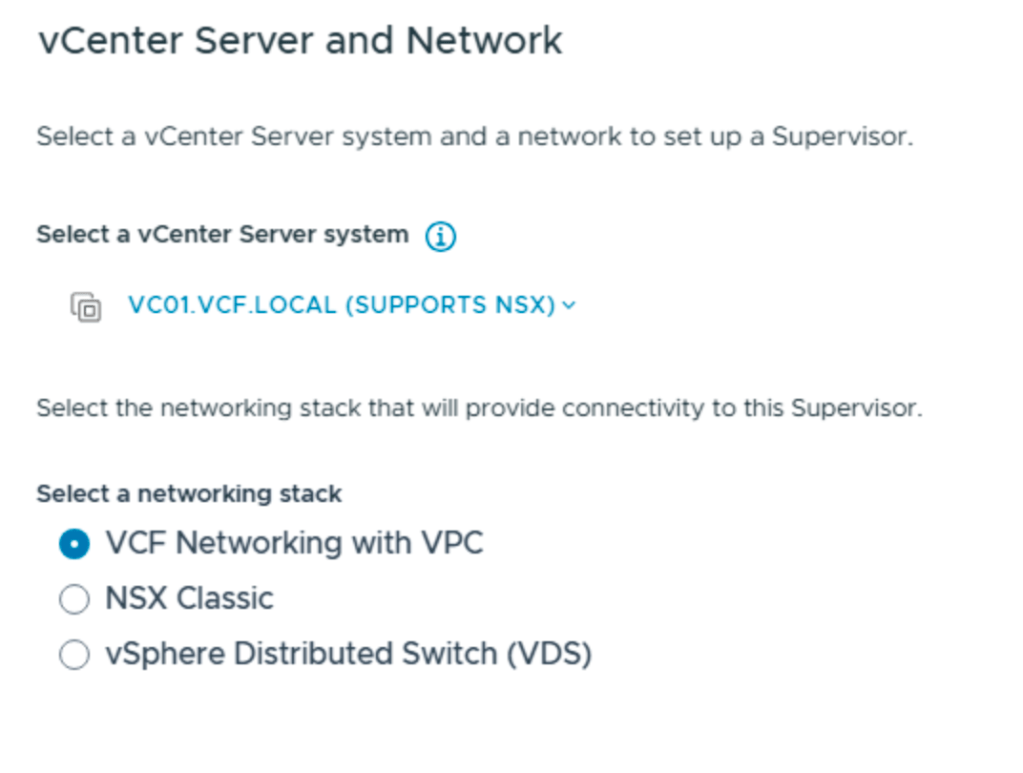
It will take you to the choices for what network option to choose for the Supervisor.
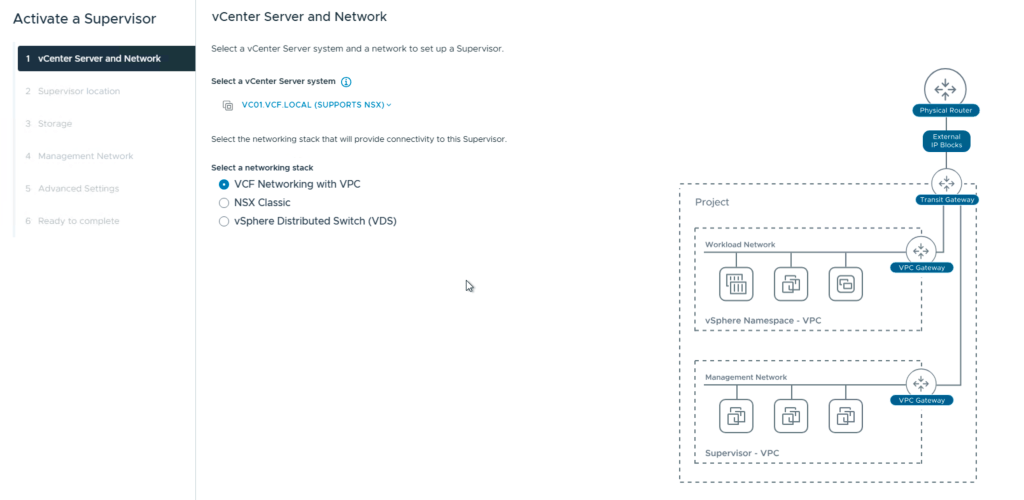
We choose VCF networking with VPC.
Next is the Supervisor name, cluster or zone, i chose cluster and set a zone name.
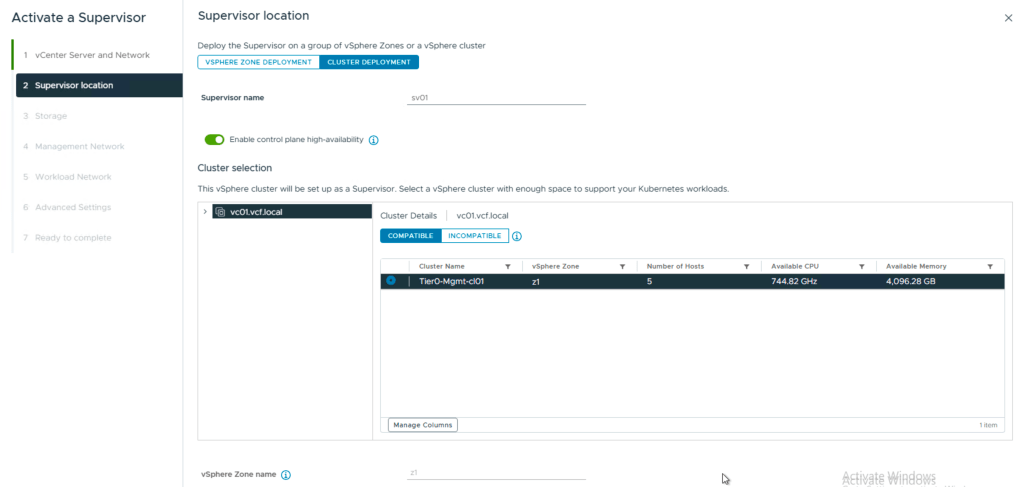
The reason for this is, i only have one cluster i this scenario. If i had several clusters i could create a zone containing several clusters with compute and resources that kubernetes could use.
One thing to notice here is the option for control plane HA.
If you don`t check this , you will have 1 control plane vm, and you later need to activate HA to get 2 more.
Check this, and you get 3 right away.

For storage i chose the default vsan storage policy wich is R1. If you in your environment need more redundancy, pick a more redundant policy like R5, R6 or mirror if you have a stretch cluster.
Rule of thumb:
- R1 – performance
- R5/R6 – capacity and redundancy
Next up is the mgmt for the supervisors.
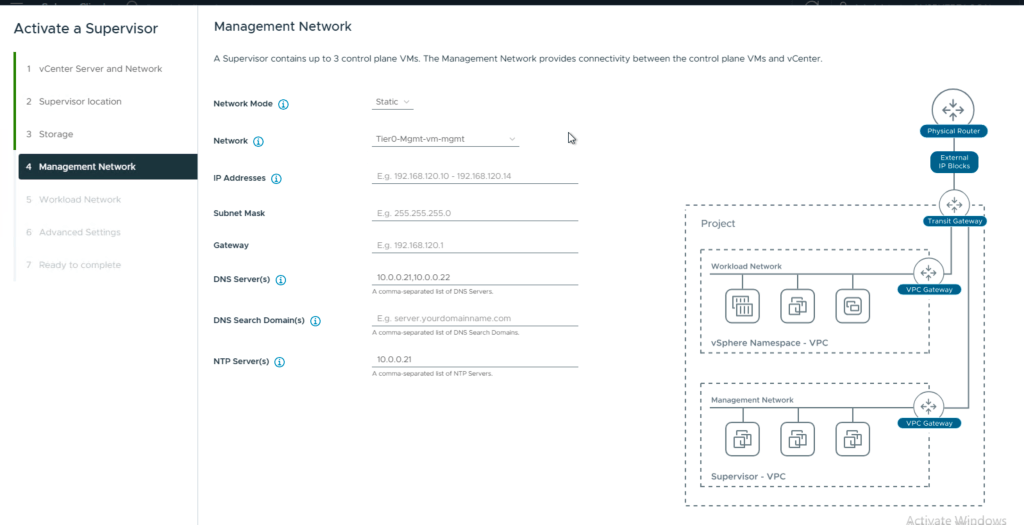
I use:
- static
- the portgroup for mgmt that connects to the virtual ip
- A range of at least 5 adresses ,xx.0.0.0/28
- mask 255.255.255.240
- gateway xx.0.0.1
- dns
- domain vcf.local
- ntp
Now we have the workload network:
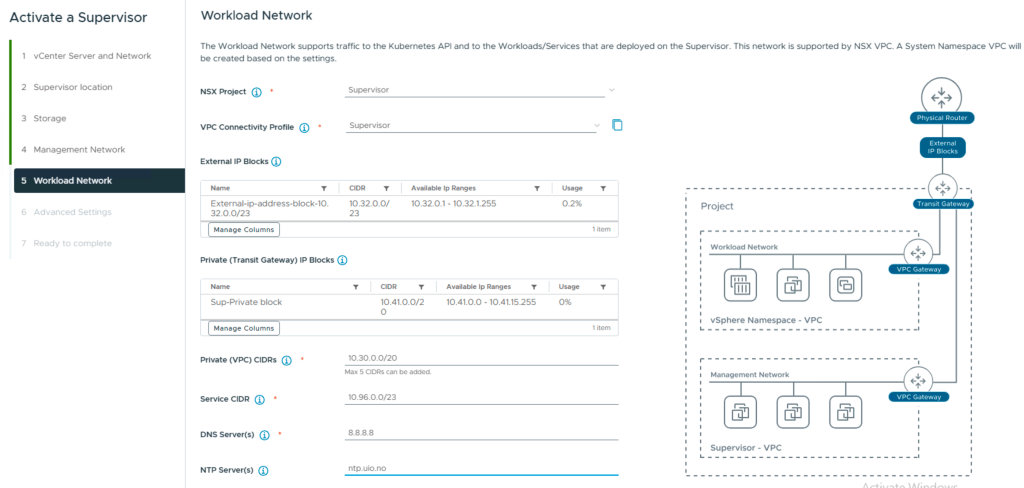
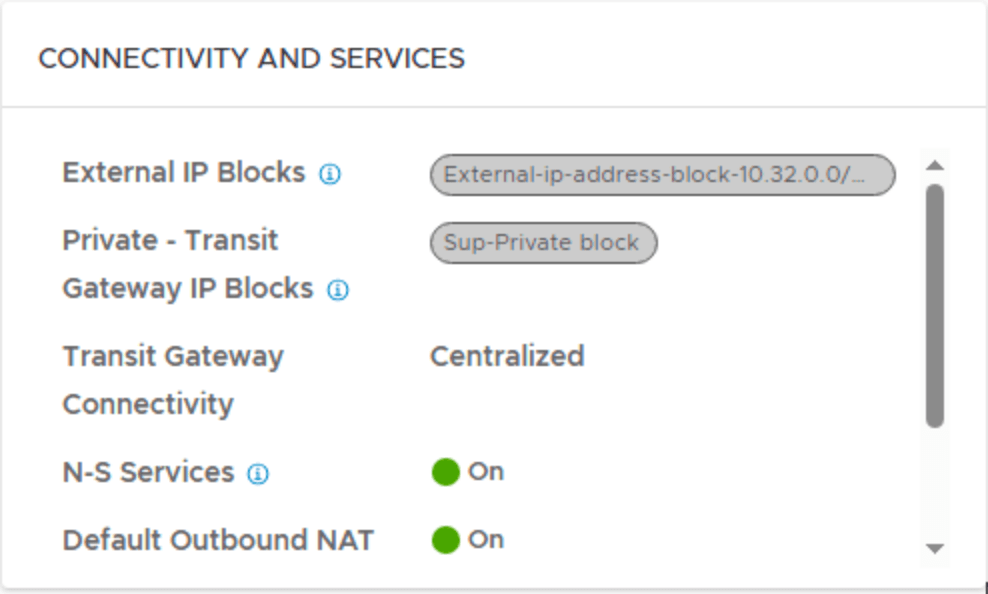
Here you see the NSX project we created, and also the VPC connectivity profile that gives us the external IP block and the private transit gateway ip block.
You add the Private VPC CIDR that you configured in your VPC earlier.
Leave the Service CIDR, its for internal Kubernetes ClusterIP Services, as long as it does not interfere with IPs of Supervisor Management components (VC, NSX, ESXs, Management DNS, NTP) and should not overlap with other datacenter IPs communicating with workloads.
Add DNS and NTP.
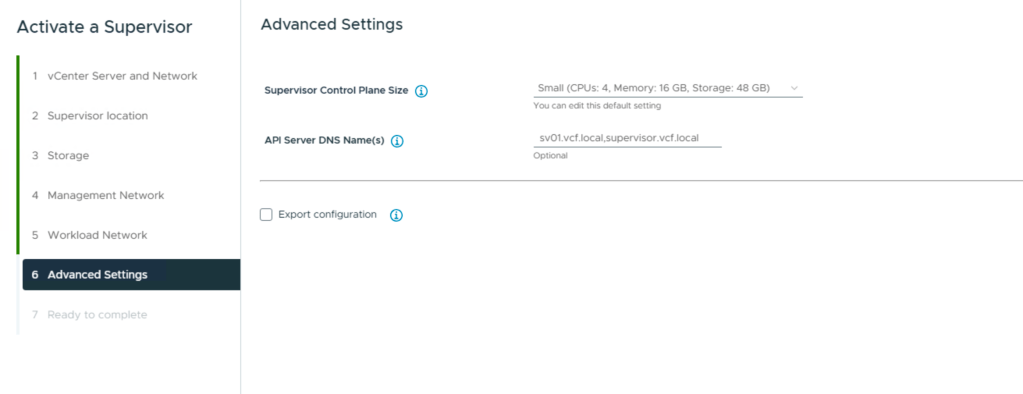
Last config is the size of the Supervisor vms and the fqdn for the API server.
Small is default.
API – Server:
Comma-separated DNS names used to access the API Server. The names will be used as the ‘SubjectAltName.DNS’ field of the API Server certificate. The Load Balancer IP address is automatically added to the IP field and should not be included here.
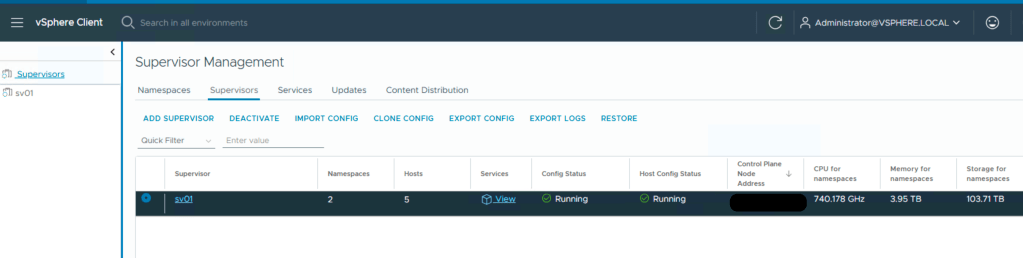
Then you are almost there. I checked the box for export configuration.
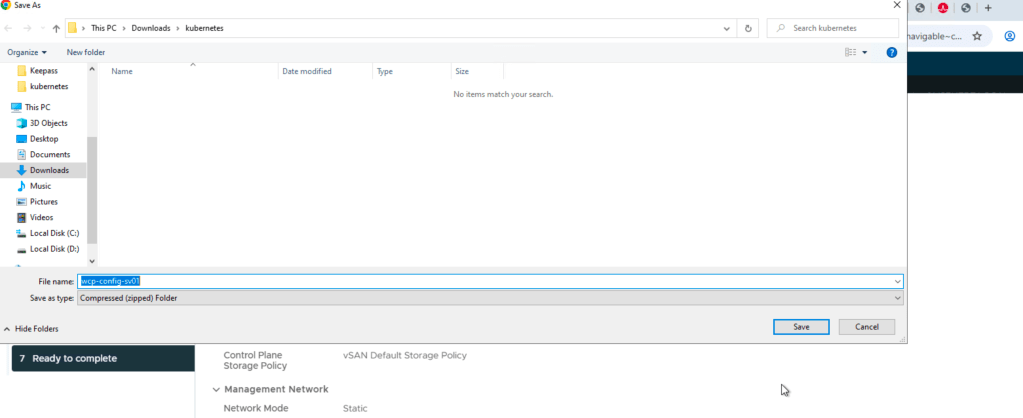
This way you can restore your config if you mess it up in some way.
and thats it, last page summarizes it all, and you can press finish.
The whole thing takes about an hour, maybe less, and you may need to configure Harbour, setup a content library for the supervisor images and other types of post-provision tasks related to kubernetes.
One thing i did was to wait for the api server to become available, and i added the ip in my dns so that it would resolve easily for FQDN.
HEADS UP:
My setup also stopped at configuring nodes, meaning the esxi nodes. The problem is the version of a VIB that is not being copied from vCenter to the hosts. There is an article on broadcom covering some of this, and i can show you the steps i did.

This was Broadcom`s solution. I found it was lacking some info:
On vCenter cli:
run:
grep -E "unable to find desired version|Unable to find image info of desired version" \/var/log/vmware/wcp/wcpsvc.log | tail -n 20You should get a specific spherelet / Kubernetes desired version (this is what Supervisor expects), for example:
v1.30.5+vmware.4-fips-vsc9.0.0.0-24686447
Match that version to the Spherelet VIB files that exist on vCenter
Spherelet VIBs are stored under the patch-store folder (as the KB indicates). On vCenter, list the available VIBs:
cd /storage/updatemgr/patch-store/hostupdate/vmw/vib20/sphereletls -1The files are typically named like:
- VMware_bootbank_spherelet_<version>.vib
Pick the VIB whose <version> matches the minor/patch version from step 1.
Example match logic
If wcpsvc.log shows desired Kubernetes version like:
v1.30.5+…
…and you have VIBs for 30.5, 29.3, and 28.2, then the correct match would be:
VMware_bootbank_spherelet_9.0.1.30.5.0-24526496.vib
Note about build numbers:
It’s normal that the build number in the “desired image info” (e.g. 24686447) does not equal the build number in the VIB filename (e.g. 24526496).
The important part is that the minor/patch matches (e.g. 30.5).
Now that you now the correct version:
Copy the correct VIB from vCenter to an ESXi host
On vCenter:
cd /storage/updatemgr/patch-store/hostupdate/vmw/vib20/sphereletscp VMware_bootbank_spherelet_9.0.1.30.5.0-24526496.vib root@<ESXI_IP>:/tmp/Install the VIB on esxi:
on esxi:
esxcli software vib install -v /tmp/VMware_bootbank_spherelet_9.0.1.30.5.0-24526496.vibThen start the activate Supervisor again, and nodes should configure fine.
Then you can test your api server:
in a browser add your api server IP:
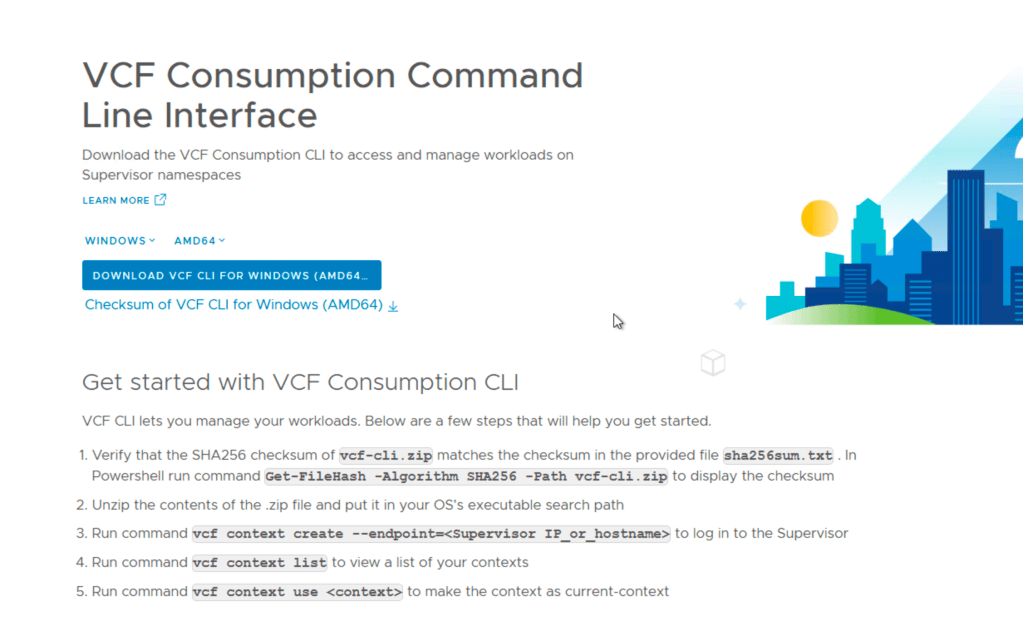
It should give you this page for downloading the vcf-cli.
Enjoy!

Leave a comment