
My previous post i configured a supervisor cluster with VPC, and now i am ready to configure the rest and have a mgmt vm i can use with all the right tools. I chose VMware Photon 5.0 that you can find on:
https://github.com/vmware/photon/wiki/Downloading-Photon-OS
It`s an ova, so easy to add to your cluster, and this is what i did:
First phase: Harbor and contour
- Install Harbor first (the package itself in the Supervisor).
- Find the load balancer IP that Harbor/Contour is actually using.
- Create the DNS A record (harbor.vcf.local -> <LB-IP>).
- After that, you can configure CA trust, run Docker login, push/pull images, create secrets, and so on.
Second phase: Sequence based on script
- Configure static networking on the management VM (IP/GW/DNS/NTP).
- Install the required tools (curl, jq, openssl, kubectl, docker, and vcf-cli).
- Connect to the Supervisor (vcf context create / kubeconfig context).
- Install the Harbor package in the Supervisor, if it is not already installed.
- Find the load balancer IP (Contour Envoy EXTERNAL-IP).
- Create the DNS A record for harbor.vcf.local.
- Alternatively, use a temporary /etc/hosts entry before DNS is in place.
- Retrieve the Harbor CA certificate (/api/v2.0/systeminfo/getcert) and add it to the CA trust store.
- Run Docker login and push a test image (for example busybox).
- Create an imagePullSecret and patch the default service account.
- Test that a pod can pull an image from Harbor.
I start with harbor and contour installation, and i need to download the files from Broadcom.
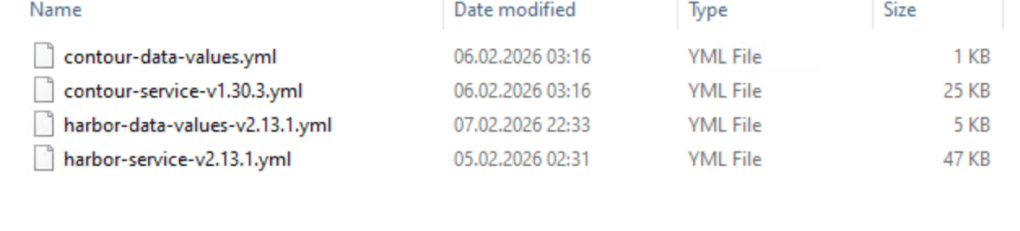
Easiest way is to logon to the support portal, choose downloads, then search for Harbor and contour.
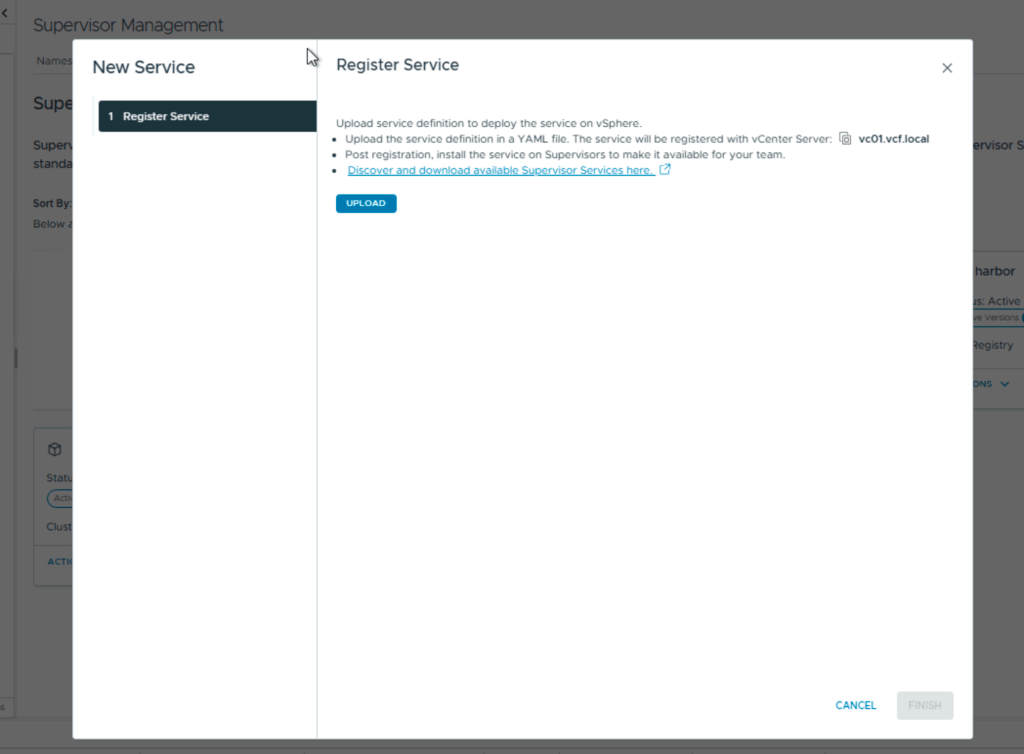
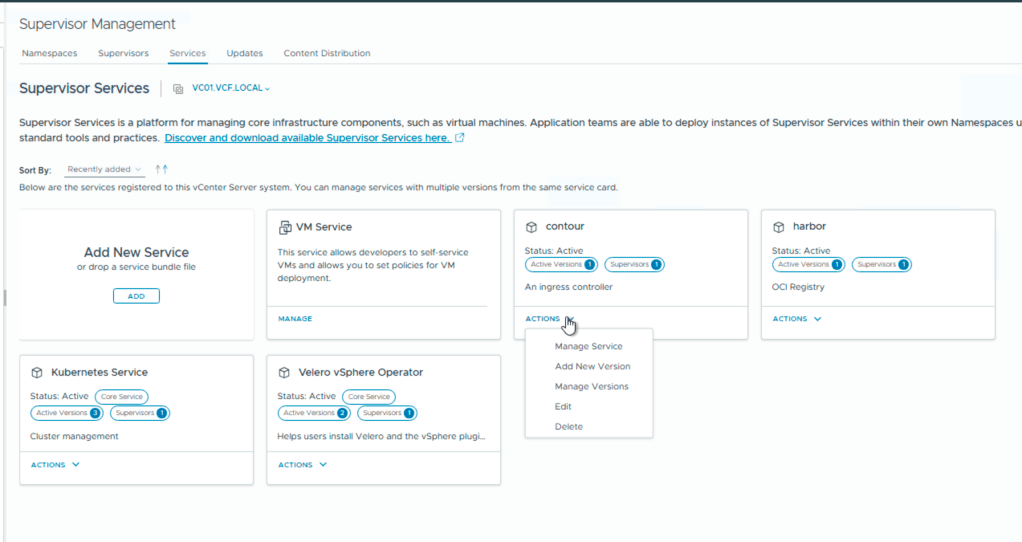
Then you login in to your vCenter, choose supervisor management and services.
Here you add your new services Harbor and Contour.
After install you need to add the contents of the second file, the data values.
first screen you choose the version
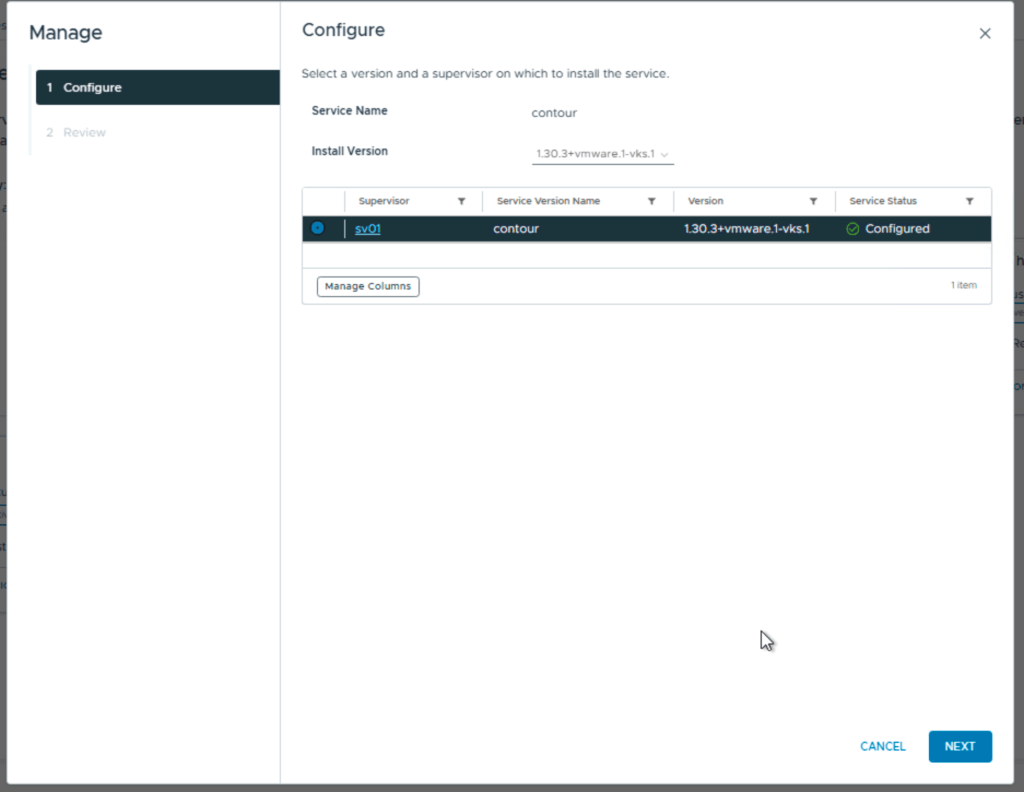
Next you add the contents from the yaml file
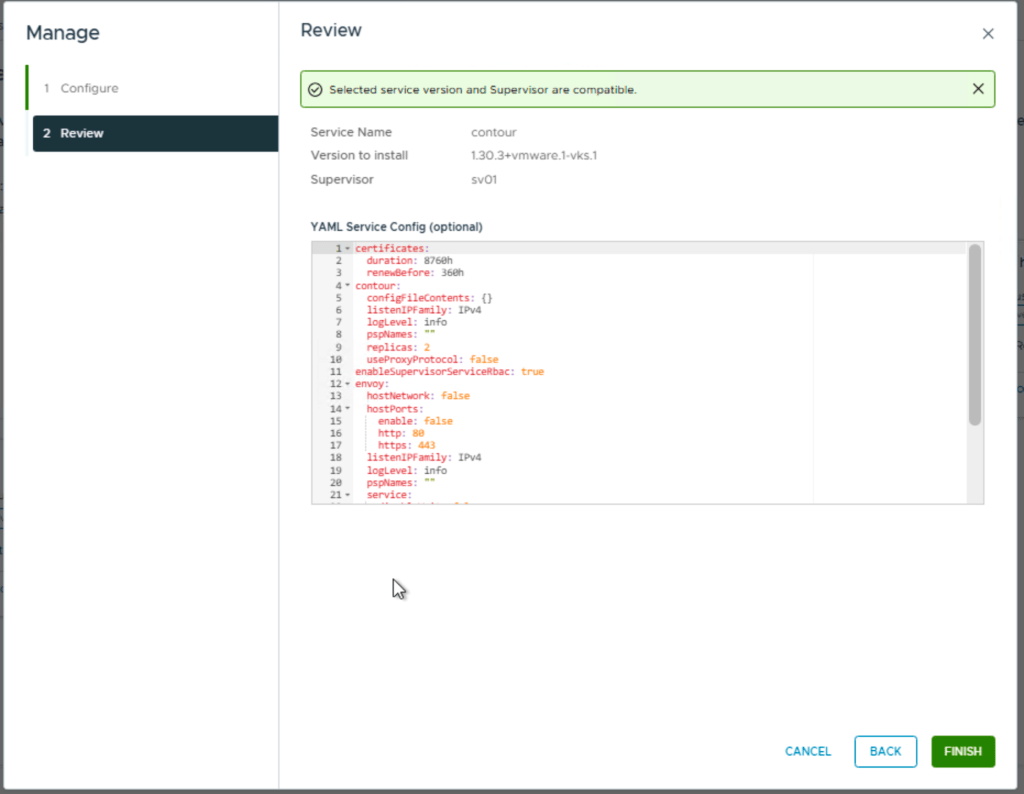
For contour you can leave this default.
Next is Harbor and you install it the same way, but the yaml file with the data values needs to be configured.
- hostname – the FQDN for Harbor, for example harbor.vcf.local
- harborAdminPassword – the Harbor admin password
- secretKey – the internal encryption key used by Harbor
- database.password – the password for the internal Harbor database
- storageClass – set this if you need a specific storage class or storage policy
- enableNginxLoadBalancer – typically enabled for external access
- enableContourHttpProxy – typically disabled in this setup
- Optional secrets to review: core.secret, core.xsrfKey, jobservice.secret, registry.secret
Ok, this takes a short while and now we need to find Harbor ip and make a fqdn in my DNS. To do this i need kubectl so i installed the windows version of VCF-cli on my win-mgmt vm. To do this is simply going to the api server portal but…., this also need fqdn, so first you need to log in to your vcenter and view your supervisor:
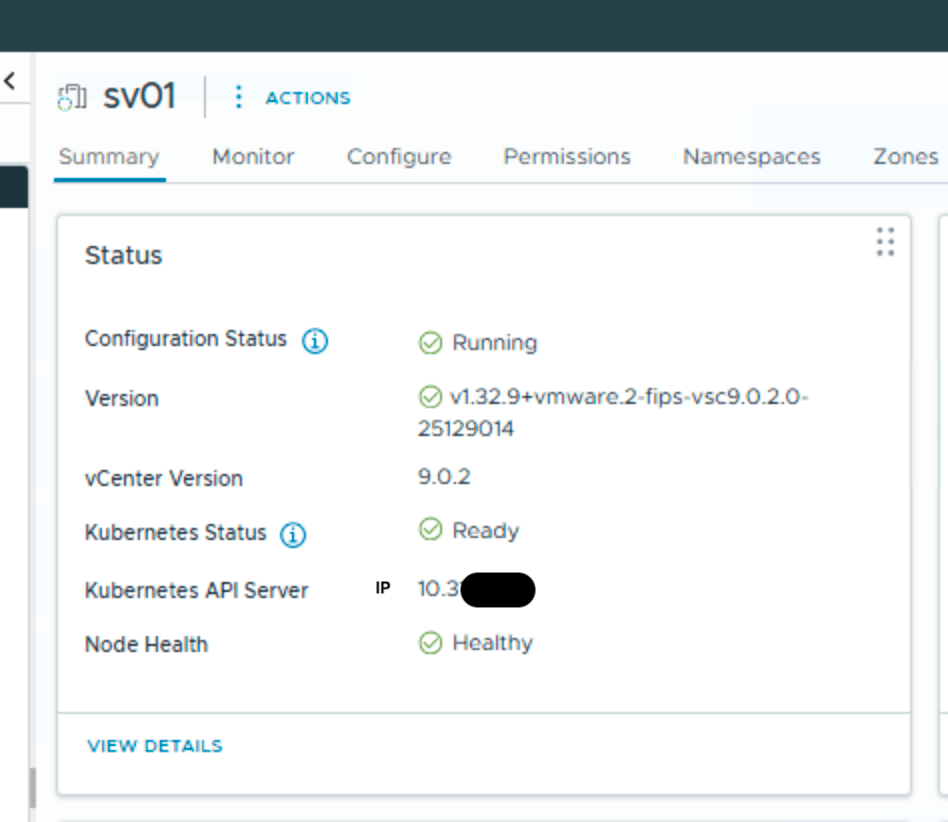
Kubernetes API server gives me the right IP, and i can add it to my DNS. i named it sv01.vcf.local
Now i can logon to the portal:

Follow the instructions running them in a powershell, and you are ready to run kubectl commands. You might stop here and just use powershell, but i found i more secure and easier to have a separate vm just for this.Since all the commands are CLI based it makes more sense to use a linux vm.
I need to find Harbor ip without DNS so i run:
kubectl --context vcflab02:svc-contour-domain-c10 -n svc-contour-domain-c10 get svc -o wideThis shows you 2 lines with contour and one for envoy. In the envoy line , look for external IP, this is the harbor ip.
Use that for fqdn for harbor.vcf.local in DNS and your harbor portal should be available. Here you login with admin and the password that you configured in the data values yaml file.
Next is two different Harbor prereqs:
A Harbor robot account should be created before running the script, because it provides the credentials used for automated registry access.
Steps
- Log in to the Harbor web interface using an administrative account.
- Open the Harbor project that will store the container images.
- Go to the Robot Accounts section for that project.
- Create a new robot account.
- Assign the permissions required for the script and image operations.
- At minimum, the account must be able to pull images.
- If the script or preparation steps will push test images, it must also be allowed to push images.
- Generate the robot account secret/password.
- Copy and save both:
- the robot account username
- the robot account password/secret
- Store these credentials securely, because they will be needed later for:
- docker login
- pushing test images
- creating a Kubernetes imagePullSecret
At the end of this step, you should have a working Harbor robot account with the correct permissions for the target Harbor project, and the credentials should be available for the next steps.
Note: vcf-cli is a prerequisite for the current version of the script and must be staged in /tmp/ before execution.
Script variables and what you need to change
This section defines the values the script will use during setup. Some values are only examples and will almost always need to be changed. Others can usually be kept unless your operating system or environment is different.
The format used is:
VARIABLE="${VARIABLE:-default_value}"This means the script uses the default value shown here unless you manually replace it in the script or provide a value as an environment variable before running it.
For example:
export HARBOR_FQDN=harbor.vcf.local
If you do not override it, the script will use the default already written in the file.
Management VM network settings
MGMT_IFACE
MGMT_IFACE="${MGMT_IFACE:-eth0}"This is the network interface on the management VM that the script will configure.
The default is eth0, but this may not be correct on every Linux system. Some systems use names such as ens192, ens160, or enp1s0.
You should verify this before running the script.
Example commands to find it:
ip addr
or
nmcli device statusWhat to change:
- Change this if your primary network interface is not eth0
Example:
MGMT_IFACE="${MGMT_IFACE:-ens192}"
MGMT_IP_CIDR
MGMT_IP_CIDR="${MGMT_IP_CIDR:-10.10.0.29/24}"This is the static IP address and subnet mask that will be configured on the management VM.
The default value is only an example. In your environment, this should be replaced with the correct management VM IP and prefix length.
Format:
- IP/prefix
Example:
- 10.10.0.29/24
How to find it:
- Use the IP address planned for the management VM
- Confirm the subnet mask from your network design or existing VM settings
If the subnet mask is 255.255.255.0, the prefix is /24
What to change:
- Almost always must be changed for the target VM unless that exact IP is correct
MGMT_GW
MGMT_GW="${MGMT_GW:-10.10.0.1}"This is the default gateway for the management VM.
The default is an example and must match the gateway for the management network where the VM will be placed.
How to find it:
- Check your network documentation
- Check an existing VM on the same subnet
- Run:
ip routeand look for the default route
Example:
default via 10.10.0.1 dev eth0What to change:
- Change this to the correct gateway for your management subnet
DNS_SERVERS
DNS_SERVERS="${DNS_SERVERS:-10.10.0.10 10.10.0.11}"This defines the DNS servers the management VM will use.
The default values are examples. These should point to DNS servers that can resolve internal records such as harbor.vcf.local.
How to find them:
- Use the DNS servers already used in your environment
- Check an existing Linux VM:
cat /etc/resolv.conf
Or check with NetworkManager:
nmcli dev show | grep DNSWhat to change:
- Change these if your environment uses different DNS servers
Example:
DNS_SERVERS="${DNS_SERVERS:-10.10.0.2 10.10.0.3}"
NTP_SERVERS
NTP_SERVERS="${NTP_SERVERS:-0.pool.ntp.org 1.pool.ntp.org}"These are the NTP servers used for time synchronization.
The default uses public pool servers. That may be acceptable in some labs, but many enterprise environments require internal NTP servers instead.
How to find them:
- Check your standard server build documentation
- Check an existing VM
- Ask which NTP servers are approved in your environment
What to change:
- Change these if your organization uses internal time sources
Example:
NTP_SERVERS="${NTP_SERVERS:-10.10.0.20 10.10.0.21}"Supervisor and Harbor settings
SUPERVISOR_CONTEXT_NAME
SUPERVISOR_CONTEXT_NAME="${SUPERVISOR_CONTEXT_NAME:-svc-tkg-domain-c10}"This is the kubectl context name used to connect to the Supervisor cluster.
The default shown here is environment-specific. It must match the context already present in the kubeconfig on the management VM.
How to find it:
Run:
kubectl config get-contextsLook for the correct Supervisor context name in the output.
Example:
CURRENT NAME* svc-tkg-domain-c10 another-contextWhat to change:
- Change this if your actual Supervisor context has a different name
SUPERVISOR_NAMESPACE
SUPERVISOR_NAMESPACE="${SUPERVISOR_NAMESPACE:-svc-tkg-domain-c10}"This is the Kubernetes namespace where the script will create the image pull secret and run the test pod.
In some environments this is the same name as the context, but not always.
How to find it:
Run:
kubectl get nsIf you already know which Supervisor Namespace or vSphere Namespace you are working with, use that value.
What to change:
- Change this if your target namespace is different
Example:
SUPERVISOR_NAMESPACE="${SUPERVISOR_NAMESPACE:-team1-dev}"
HARBOR_FQDN
HARBOR_FQDN="${HARBOR_FQDN:-harbor.vcf.local}"This is the fully qualified domain name used to access Harbor.
The script uses this name for certificate retrieval, Docker login, image push/pull, and Kubernetes image pull secret creation.
The default is only valid if your Harbor deployment really uses harbor.vcf.local.
How to find it:
- Use the hostname configured in the Harbor data values file
- Check your DNS record
- Confirm that it resolves correctly
Example:
nslookup harbor.vcf.localWhat to change:
- Change this if Harbor uses a different hostname
HARBOR_PROJECT
HARBOR_PROJECT="${HARBOR_PROJECT:-library}"This is the Harbor project where the test image will be pushed.
The default library may work in some environments, but often you will use a custom project.
How to find it:
- Log in to Harbor and check the project name
- Use the exact project that your robot account has access to
Examples:
- library
- demo
- tenant1
- apps
What to change:
- Change this if your test image should be pushed to a different Harbor project
Harbor robot account credentials
HARBOR_ROBOT_USER
HARBOR_ROBOT_USER="${HARBOR_ROBOT_USER:-robot\$library+puller}"This is the Harbor robot account username used for Docker and Kubernetes authentication.
The default shown here is only an example. The actual name must match the robot account created in Harbor.
Important:
The backslash before $ is intentional in Bash. It prevents $library from being treated as a shell variable.
How to find it:
- In Harbor, open the project
- Go to Robot Accounts
- Copy the exact generated robot account username
Examples:
robot$library+pullerrobot$demo+ci
In the script, it must be written like this:
HARBOR_ROBOT_USER="${HARBOR_ROBOT_USER:-robot\$demo+ci}"What to change:
- Almost always must be changed to your real robot account name
HARBOR_ROBOT_PASSWORD
HARBOR_ROBOT_PASSWORD="${HARBOR_ROBOT_PASSWORD:-CHANGE_ME}"This is the password or secret for the Harbor robot account.
The default CHANGE_ME is a placeholder and must always be replaced.
How to find it:
- Use the robot account secret generated when the account was created in Harbor
- Save it when created, because Harbor may not show it again later in the same way
What to change:
- Always change this before running the script
Example:
HARBOR_ROBOT_PASSWORD="${HARBOR_ROBOT_PASSWORD:-MyRobotSecretValue}"A better practice is to set it as an environment variable instead of storing it directly in the script.
Example:
export HARBOR_ROBOT_PASSWORD='MyRobotSecretValue'DNS fallback behavior
USE_ETC_HOSTS_FALLBACK
USE_ETC_HOSTS_FALLBACK="${USE_ETC_HOSTS_FALLBACK:-false}"This controls what happens if DNS is not yet in place for Harbor.
Default:
- false
Behavior:
- If false, the script expects DNS to already resolve the Harbor FQDN
- If true, the script can add a temporary /etc/hosts entry using the Harbor load balancer IP
What to change:
- Leave as false if DNS is already configured
- Set to true if you want the script to use /etc/hosts temporarily
Example:
USE_ETC_HOSTS_FALLBACK="${USE_ETC_HOSTS_FALLBACK:-true}"This is useful during initial setup before the DNS record has been created.
Harbor CA certificate paths
HARBOR_CA_TMP_PATH
HARBOR_CA_TMP_PATH="${HARBOR_CA_TMP_PATH:-/tmp/harbor-ca.crt}"This is the temporary location where the Harbor CA certificate is downloaded before being installed into the trust store.
The default is usually fine.
What to change:
- Normally no change is needed
HARBOR_CA_DEBIAN_PATH
HARBOR_CA_DEBIAN_PATH="${HARBOR_CA_DEBIAN_PATH:-/usr/local/share/ca-certificates/harbor-ca.crt}"This is the trust store path used on Debian or Ubuntu based systems.
The default is normally correct.
What to change:
- Usually do not change unless your OS uses a different CA certificate path
HARBOR_CA_RHEL_PATH
HARBOR_CA_RHEL_PATH="${HARBOR_CA_RHEL_PATH:-/etc/pki/ca-trust/source/anchors/harbor-ca.crt}"This is the trust store path used on RHEL, Rocky, CentOS, or Photon-like systems using update-ca-trust.
The default is normally correct.
What to change:
- Usually no change is needed
Practical example
A realistic customized section might look like this:
MGMT_IFACE="${MGMT_IFACE:-ens192}"MGMT_IP_CIDR="${MGMT_IP_CIDR:-10.10.0.29/24}"MGMT_GW="${MGMT_GW:-10.10.0.1}"DNS_SERVERS="${DNS_SERVERS:-10.10.0.10 10.10.0.11}"NTP_SERVERS="${NTP_SERVERS:-10.10.0.20 10.10.0.21}"SUPERVISOR_CONTEXT_NAME="${SUPERVISOR_CONTEXT_NAME:-svc-tkg-domain-c10}"SUPERVISOR_NAMESPACE="${SUPERVISOR_NAMESPACE:-svc-tkg-domain-c10}"HARBOR_FQDN="${HARBOR_FQDN:-harbor.vcf.local}"HARBOR_PROJECT="${HARBOR_PROJECT:-demo}"HARBOR_ROBOT_USER="${HARBOR_ROBOT_USER:-robot\$demo+puller}"HARBOR_ROBOT_PASSWORD="${HARBOR_ROBOT_PASSWORD:-REPLACE_WITH_REAL_SECRET}"USE_ETC_HOSTS_FALLBACK="${USE_ETC_HOSTS_FALLBACK:-true}"In most environments, these should be reviewed and usually changed:
- MGMT_IFACE
- MGMT_IP_CIDR
- MGMT_GW
- DNS_SERVERS
- NTP_SERVERS
- SUPERVISOR_CONTEXT_NAME
- SUPERVISOR_NAMESPACE
- HARBOR_FQDN
- HARBOR_PROJECT
- HARBOR_ROBOT_USER
- HARBOR_ROBOT_PASSWORD
These can usually be left as default unless you have a special requirement:
- USE_ETC_HOSTS_FALLBACK
- HARBOR_CA_TMP_PATH
- HARBOR_CA_DEBIAN_PATH
- HARBOR_CA_RHEL_PATH
Next is running the script, this is how:
Save the script to a file with nano or VI, for example:
nano harbor-setup.shPaste the script content into the file, then save and exit.
Make the script executable:
chmod +x harbor-setup.sh
Run the script as root or with sudo:
./harbor-setup.shorsudo ./harbor-setup.shScript:
#!/usr/bin/env bashset -Eeuo pipefail######################################### User-configurable variables########################################MGMT_IFACE="${MGMT_IFACE:-eth0}"MGMT_IP_CIDR="${MGMT_IP_CIDR:-10.0.0.29/24}"MGMT_GW="${MGMT_GW:-10.0.0.1}"DNS_SERVERS="${DNS_SERVERS:-10.0.0.10 10.0.0.11}"NTP_SERVERS="${NTP_SERVERS:-0.pool.ntp.org 1.pool.ntp.org}"SUPERVISOR_CONTEXT_NAME="${SUPERVISOR_CONTEXT_NAME:-svc-tkg-domain-c10}"SUPERVISOR_NAMESPACE="${SUPERVISOR_NAMESPACE:-svc-tkg-domain-c10}"HARBOR_FQDN="${HARBOR_FQDN:-harbor.vcf.local}"HARBOR_PROJECT="${HARBOR_PROJECT:-library}"HARBOR_ROBOT_USER="${HARBOR_ROBOT_USER:-robot\$library+puller}"HARBOR_ROBOT_PASSWORD="${HARBOR_ROBOT_PASSWORD:-CHANGE_ME}"USE_ETC_HOSTS_FALLBACK="${USE_ETC_HOSTS_FALLBACK:-false}"HARBOR_CA_TMP_PATH="${HARBOR_CA_TMP_PATH:-/tmp/harbor-ca.crt}"HARBOR_CA_DEBIAN_PATH="${HARBOR_CA_DEBIAN_PATH:-/usr/local/share/ca-certificates/harbor-ca.crt}"HARBOR_CA_RHEL_PATH="${HARBOR_CA_RHEL_PATH:-/etc/pki/ca-trust/source/anchors/harbor-ca.crt}"######################################### Helpers########################################log() { echo "[INFO] $*"; }warn() { echo "[WARN] $*" >&2; }err() { echo "[ERROR] $*" >&2; }die() { err "$*"; exit 1; }require_root() { [[ "${EUID}" -eq 0 ]] || die "Run this script as root or with sudo."}command_exists() { command -v "$1" >/dev/null 2>&1}detect_pkg_mgr() { if command_exists tdnf; then echo "tdnf" elif command_exists dnf; then echo "dnf" elif command_exists yum; then echo "yum" elif command_exists apt-get; then echo "apt" else die "No supported package manager found." fi}install_packages() { local pkg_mgr pkg_mgr="$(detect_pkg_mgr)" case "$pkg_mgr" in tdnf) tdnf makecache -y tdnf install -y "$@" ;; dnf) dnf makecache -y dnf install -y "$@" ;; yum) yum makecache -y yum install -y "$@" ;; apt) apt-get update DEBIAN_FRONTEND=noninteractive apt-get install -y "$@" ;; esac}######################################### Step 1 - Configure static networking########################################configure_network() { log "Configuring static networking on ${MGMT_IFACE}" if command_exists nmcli; then local conn_name conn_name="$(nmcli -t -f NAME,DEVICE con show --active | awk -F: -v dev="$MGMT_IFACE" '$2==dev{print $1; exit}')" [[ -n "$conn_name" ]] || die "Could not find active NetworkManager connection for ${MGMT_IFACE}" nmcli con mod "$conn_name" ipv4.addresses "$MGMT_IP_CIDR" nmcli con mod "$conn_name" ipv4.gateway "$MGMT_GW" nmcli con mod "$conn_name" ipv4.method manual nmcli con mod "$conn_name" ipv4.dns "$(echo "$DNS_SERVERS" | xargs | sed 's/ /,/g')" nmcli con down "$conn_name" || true nmcli con up "$conn_name" else warn "No NetworkManager detected. Adjust networking manually if required." fi if command_exists timedatectl; then timedatectl set-ntp true || true fi if command_exists chronyc || [[ -f /etc/chrony.conf ]]; then cp -a /etc/chrony.conf /etc/chrony.conf.bak.$(date +%s) || true { echo "# Managed by script" for s in $NTP_SERVERS; do echo "server ${s} iburst" done } > /etc/chrony.conf systemctl enable chronyd >/dev/null 2>&1 || true systemctl restart chronyd >/dev/null 2>&1 || true fi}######################################### Step 2 - Install required tools########################################install_base_tools() { log "Installing base tools" local pkg_mgr pkg_mgr="$(detect_pkg_mgr)" case "$pkg_mgr" in tdnf|dnf|yum) install_packages curl jq openssl ca-certificates tar gzip ;; apt) install_packages curl jq openssl ca-certificates tar gzip gnupg lsb-release ;; esac}install_docker() { if command_exists docker; then log "Docker already installed" systemctl enable docker >/dev/null 2>&1 || true systemctl start docker >/dev/null 2>&1 || true return fi log "Installing Docker" local pkg_mgr pkg_mgr="$(detect_pkg_mgr)" case "$pkg_mgr" in tdnf|dnf|yum) install_packages docker ;; apt) install_packages docker.io ;; esac systemctl enable docker >/dev/null 2>&1 || true systemctl start docker >/dev/null 2>&1 || true sleep 3 docker version >/dev/null 2>&1 || die "Docker installation completed, but Docker is not working."}check_prereqs() { log "Checking prerequisites" command_exists kubectl || die "kubectl is not available. Ensure vcf-cli/kubectl is installed before running this script." if ! kubectl config get-contexts "${SUPERVISOR_CONTEXT_NAME}" >/dev/null 2>&1; then warn "kubectl context ${SUPERVISOR_CONTEXT_NAME} not found yet." warn "Create it before running Harbor-related kubectl steps." fi}######################################### Step 3 - Connect to Supervisor########################################connect_supervisor() { log "Checking Supervisor connectivity" if kubectl config get-contexts "${SUPERVISOR_CONTEXT_NAME}" >/dev/null 2>&1; then kubectl config use-context "${SUPERVISOR_CONTEXT_NAME}" >/dev/null log "Using existing kubectl context: ${SUPERVISOR_CONTEXT_NAME}" else warn "Supervisor context ${SUPERVISOR_CONTEXT_NAME} not found." fi}######################################### Step 4 - Find Harbor LB IP########################################get_harbor_lb_ip() { log "Looking up Harbor/Contour Load Balancer IP" local lb_ip="" local ns="${SUPERVISOR_NAMESPACE}" if kubectl get ns "${ns}" >/dev/null 2>&1; then lb_ip="$(kubectl --context "${SUPERVISOR_CONTEXT_NAME}" -n "${ns}" get svc 2>/dev/null | awk '/envoy|contour/ && /LoadBalancer/ {print $4; exit}')" fi if [[ -z "$lb_ip" || "$lb_ip" == "<pending>" ]]; then warn "Could not determine Harbor LB IP automatically." lb_ip="${HARBOR_LB_IP:-}" fi [[ -n "$lb_ip" ]] || die "Harbor LB IP not found." echo "$lb_ip"}######################################### Step 5 - DNS or /etc/hosts########################################configure_name_resolution() { local lb_ip="$1" if getent hosts "${HARBOR_FQDN}" >/dev/null 2>&1; then log "${HARBOR_FQDN} already resolves" return fi if [[ "${USE_ETC_HOSTS_FALLBACK}" == "true" ]]; then echo "${lb_ip} ${HARBOR_FQDN}" >> /etc/hosts log "Added temporary /etc/hosts entry for ${HARBOR_FQDN}" else die "DNS is not in place for ${HARBOR_FQDN}. Create the DNS record or enable USE_ETC_HOSTS_FALLBACK=true." fi}######################################### Step 6 - Retrieve Harbor CA and trust it########################################install_harbor_ca() { log "Retrieving Harbor CA certificate" rm -f "${HARBOR_CA_TMP_PATH}" curl -fsSL "https://${HARBOR_FQDN}/api/v2.0/systeminfo/getcert" -o "${HARBOR_CA_TMP_PATH}" [[ -s "${HARBOR_CA_TMP_PATH}" ]] || die "Downloaded Harbor CA certificate is empty." if command_exists update-ca-certificates; then cp -f "${HARBOR_CA_TMP_PATH}" "${HARBOR_CA_DEBIAN_PATH}" update-ca-certificates elif command_exists update-ca-trust; then cp -f "${HARBOR_CA_TMP_PATH}" "${HARBOR_CA_RHEL_PATH}" update-ca-trust extract else die "No supported CA trust update tool found." fi log "Harbor CA certificate installed successfully"}######################################### Step 7 - Validate Harbor registry access########################################docker_login_harbor() { log "Logging in to Harbor with robot account" echo "${HARBOR_ROBOT_PASSWORD}" | docker login "${HARBOR_FQDN}" -u "${HARBOR_ROBOT_USER}" --password-stdin}validate_push_pull() { log "Validating Harbor push/pull with busybox" local src_img="busybox:latest" local dst_img="${HARBOR_FQDN}/${HARBOR_PROJECT}/busybox:latest" docker pull "${src_img}" docker tag "${src_img}" "${dst_img}" docker push "${dst_img}" docker rmi "${dst_img}" >/dev/null 2>&1 || true docker pull "${dst_img}" log "Push/pull validation completed successfully"}######################################### Main########################################main() { require_root configure_network install_base_tools install_docker check_prereqs connect_supervisor local lb_ip lb_ip="$(get_harbor_lb_ip)" log "Detected Harbor LB IP: ${lb_ip}" configure_name_resolution "${lb_ip}" install_harbor_ca docker_login_harbor validate_push_pull log "All prerequisite validation steps completed successfully."}main "$@"If all settings are verified and ok you should have a new mgmt vm ready to go.

Leave a comment