
In a previous post i configured a supervisor cluster with VPC, and now i am ready to configure the rest and have a mgmt vm i can use with all the right tools. I chose VMware Photon 5.0 that you can find on:
https://github.com/vmware/photon/wiki/Downloading-Photon-OS
It`s an ova, so easy to add to your cluster, and this is what i did after deploying the ova:
First phase: Harbor and Contour
- Install Harbor first (the package itself in the Supervisor).
- Find the load balancer IP that Harbor/Contour is actually using.
- Create the DNS A record (harbor.vcf.local -> <LB-IP>).
- After that, you can configure CA trust, run Docker login, push/pull images, create secrets, and so on.
Second phase: Sequence based on scripts
- Configure static networking on the management VM (IP/GW/DNS/NTP).
- Install the required tools (curl, jq, openssl, kubectl, docker, and vcf-cli).
- Connect to the Supervisor (vcf context create / kubeconfig context).
- Install the Harbor package in the Supervisor, if it is not already installed.
- Find the load balancer IP (Contour Envoy EXTERNAL-IP).
- Create the DNS A record for harbor.vcf.local.
- Alternatively, use a temporary /etc/hosts entry before DNS is in place.
- Retrieve the Harbor CA certificate (/api/v2.0/systeminfo/getcert) and add it to the CA trust store.
- Run Docker login and push a test image (for example busybox).
- Create an imagePullSecret and patch the default service account.
- Test that a pod can pull an image from Harbor.
I start with harbor and contour installation, and i need to download the files from Broadcom.
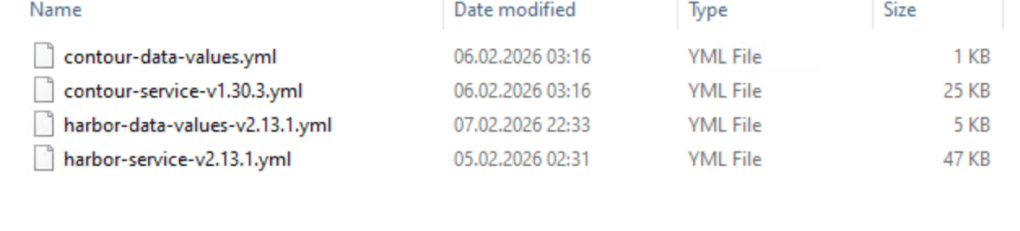
Easiest way is to logon to the support portal, choose downloads, then search for Harbor and contour.
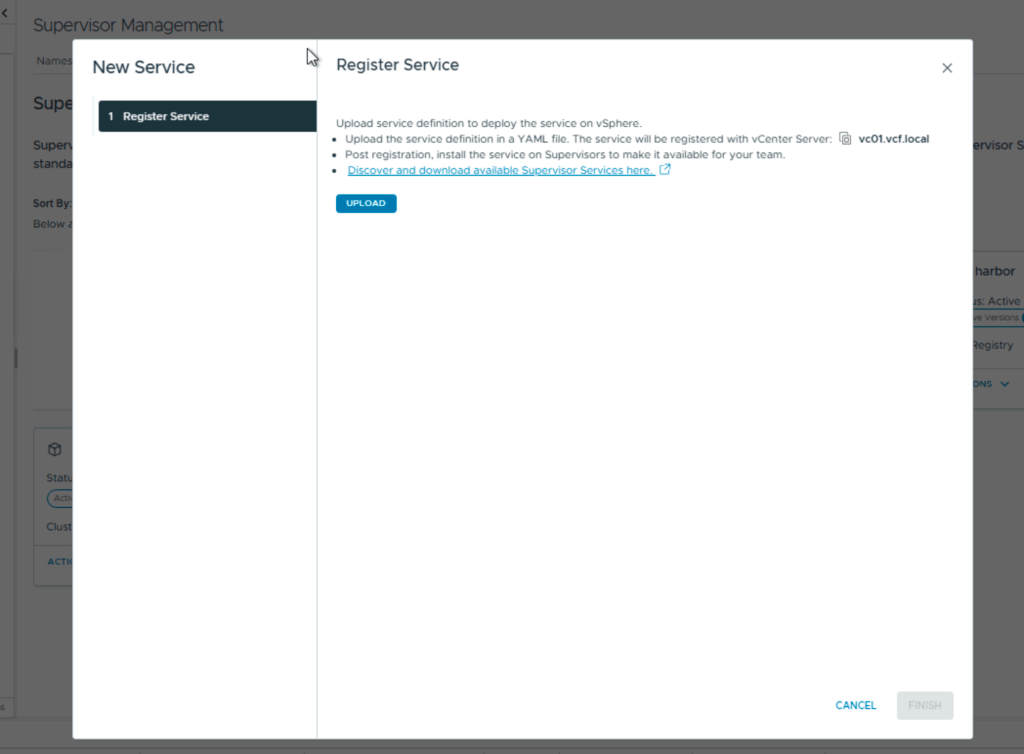
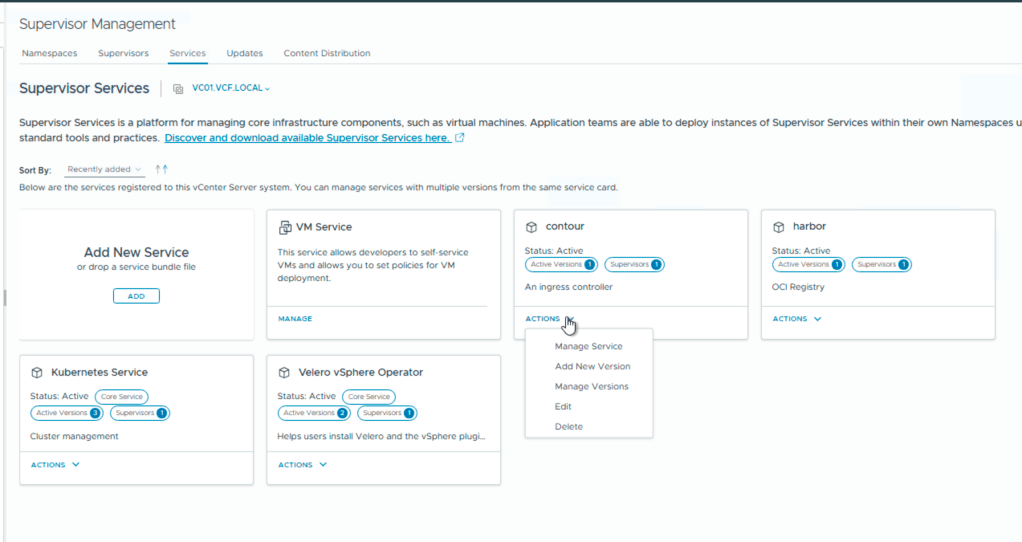
Then you login in to your vCenter, choose supervisor management and services.
Here you add your new services Harbor and Contour.
After install you need to add the contents of the second file, the data values.
first screen you choose the version
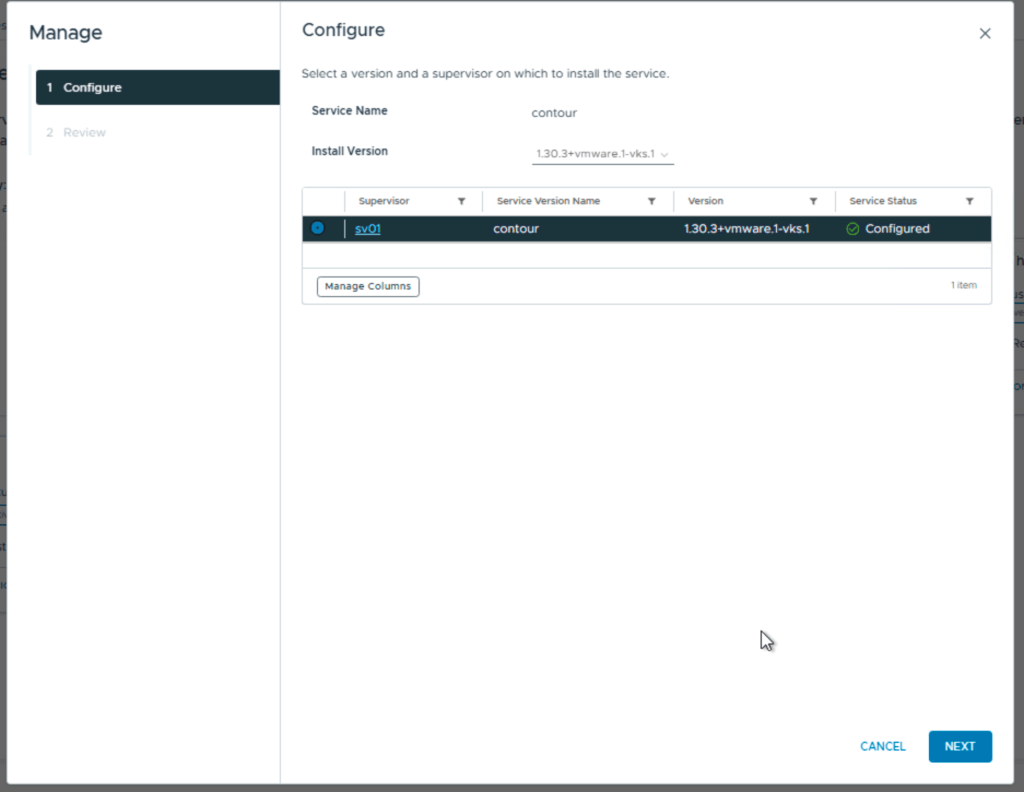
Next you add the contents from the yaml file
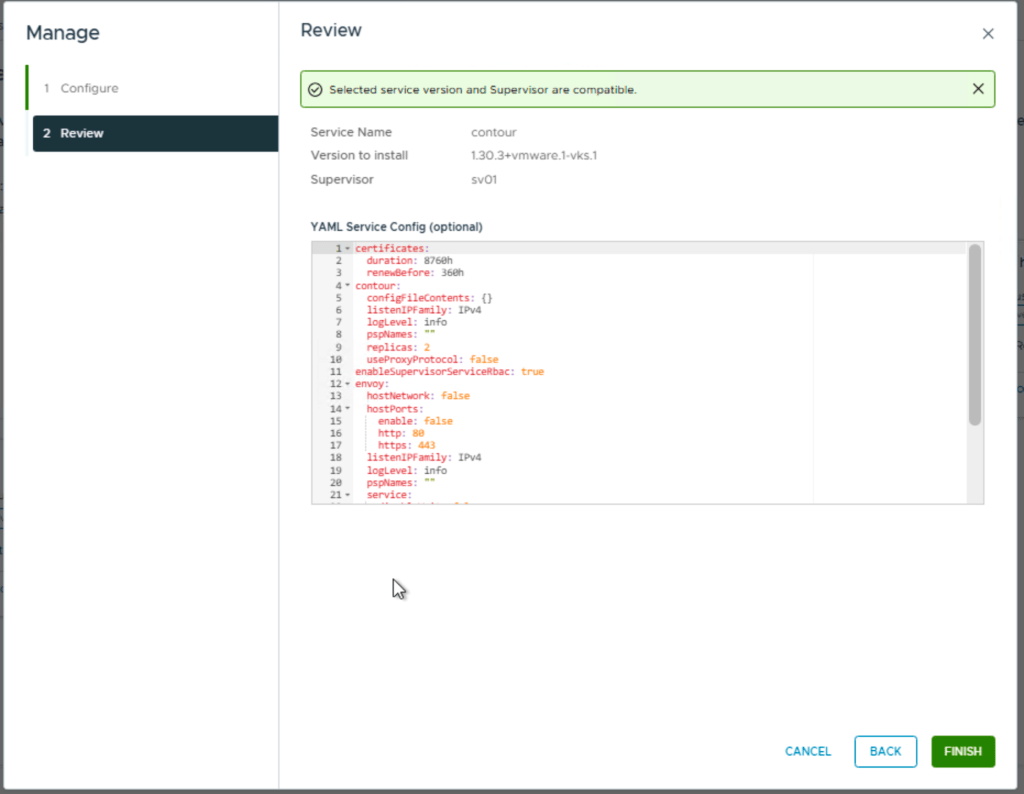
For contour you can leave this default.
Next is Harbor and you install it the same way, but the yaml file with the data values needs to be configured.
- hostname – the FQDN for Harbor, for example harbor.vcf.local
- harborAdminPassword – the Harbor admin password
- secretKey – the internal encryption key used by Harbor
- database.password – the password for the internal Harbor database
- storageClass – set this if you need a specific storage class or storage policy
- enableNginxLoadBalancer – typically enabled for external access
- enableContourHttpProxy – typically disabled in this setup
- Optional secrets to review: core.secret, core.xsrfKey, jobservice.secret, registry.secret
Ok, this takes a short while and now we need to find Harbor ip and make a fqdn in my DNS. To do this i need kubectl so i installed the windows version of VCF-cli on my win-mgmt vm. Normally you go to the api server portal for this but…., this also need fqdn, so first you need to log in to your vcenter and view your supervisor:
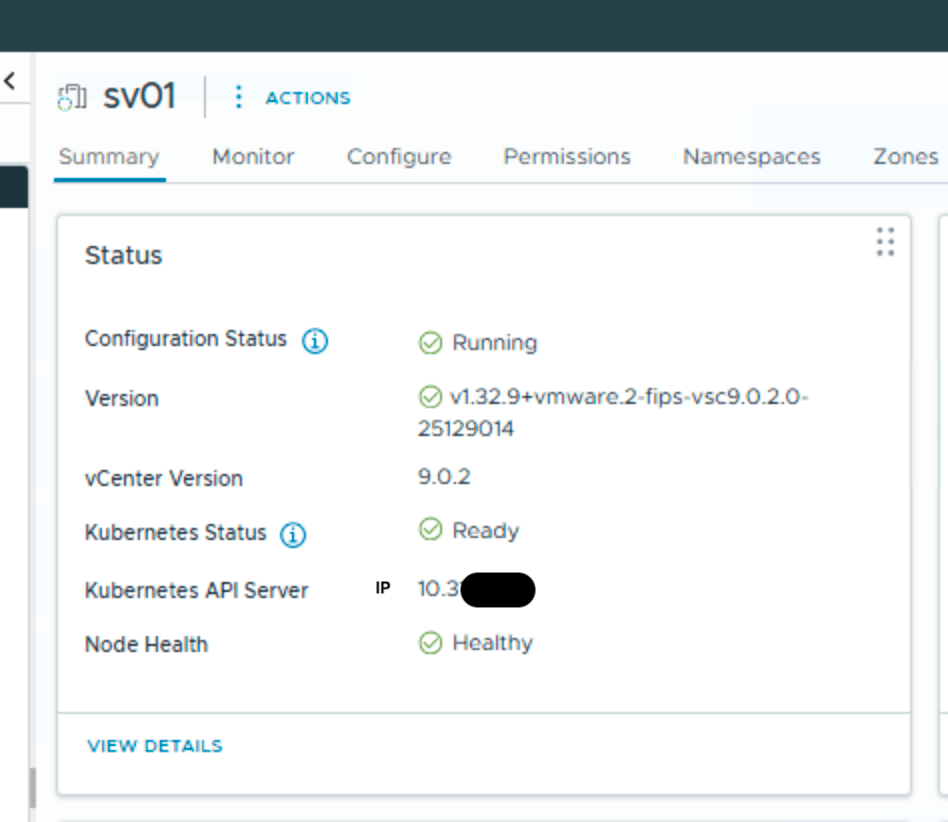
Kubernetes API server gives me the right IP, and i can add it to my DNS. i named it sv01.vcf.local. This is the same FQDN i defined in the supervisor installation.
Now i can logon to the portal:

Follow the instructions running them in a powershell, and you are ready to run kubectl commands. I first run these on my windows mgmt vm.
I need to find Harbor ip without DNS so i run:
kubectl --context vcflab02:svc-contour-domain-c10 -n svc-contour-domain-c10 get svc -o wide
This shows you 2 lines with contour and one for envoy. In the envoy line , look for external IP, this is the harbor ip.
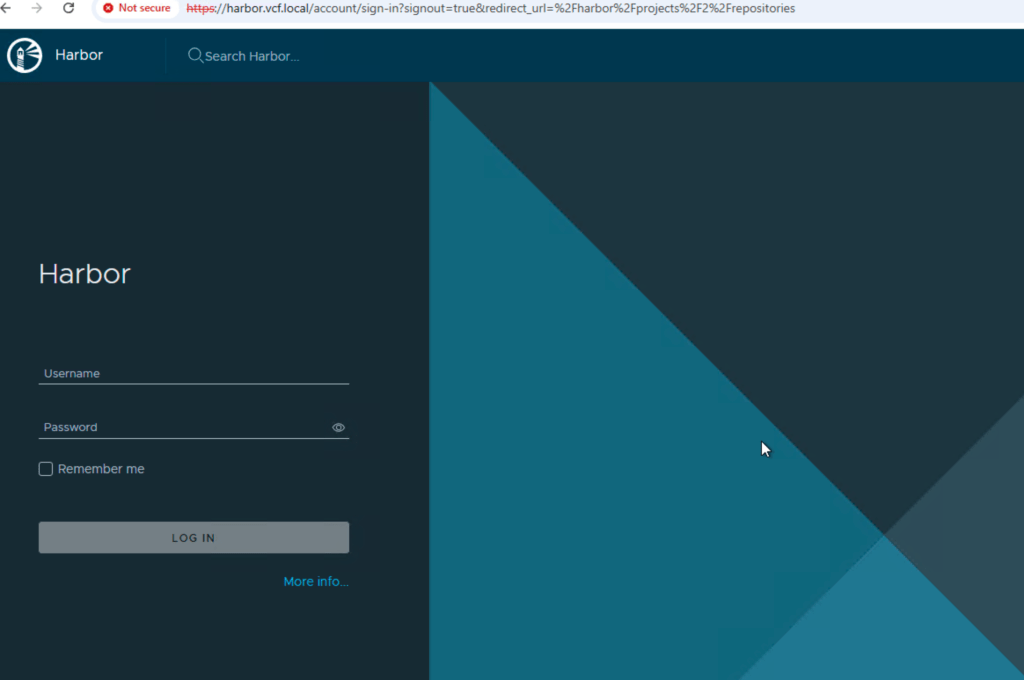
Use that for fqdn for harbor.vcf.local in DNS and your harbor portal should be available. Here you login with admin and the password that you configured in the data values yaml file.
Next is two different Harbor prereqs:
A Harbor robot account should be created before running the script, because it provides the credentials used for automated registry access.
Steps
- Log in to the Harbor web interface using an administrative account.
- Open the Harbor project that will store the container images.
- Go to the Robot Accounts section for that project.
- Create a new robot account.
- Assign the permissions required for the script and image operations.
- At minimum, the account must be able to pull images.
- If the script or preparation steps will push test images, it must also be allowed to push images.
- Generate the robot account secret/password.
- Copy and save both:
- the robot account username
- the robot account password/secret
- Store these credentials securely, because they will be needed later for:
- docker login
- pushing test images
- creating a Kubernetes imagePullSecret
At the end of this step, you should have a working Harbor robot account with the correct permissions for the target Harbor project, and the credentials should be available for the next steps.
You might stop here and just use powershell, but i found it more secure and easier to have a separate vm just for this.Since all the commands are CLI based it makes more sense to use a linux vm.
This next section in the post is all about the scripts to configure your Photon vm.
Note: vcf-cli is a prerequisite for the current version of the scripts and must be staged in a separate directory before execution, i used /root/bootstrap/.
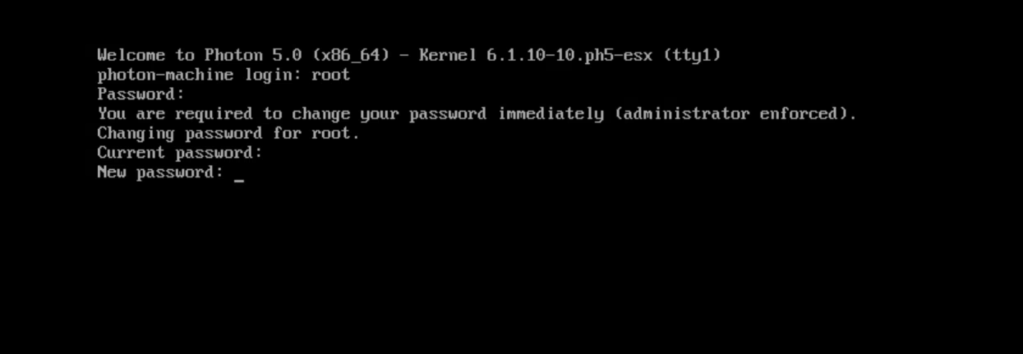
First i deploy a new Photon vm. I start a remote console in vcenter and log in with root. Default password for root is changeme, so change this the first time you log in.
Next is to set an ip on interface eth0 so i can reach the server with ssh.

Then we create a directory for the scripts and vcf-cli.
Now i can copy the vcf-cli tar file with scp to /root/bootstrap with powershell

I do the same with all my scripts:

Next is ssh login with putty.
I cd to /root/bootstrap/ and edit the first script with my lab info.

When the config script is done, you can start with 01.
before you do, verify that all your scripts don`t have crlf errors, run this:
sed -i 's/\r$//' *.shchmod +x *.sh
This is the order for the scripts:
cd /root/bootstrapsed -i 's/\r$//' *.shchmod +x *.sh./01-network-hostname-ntp.sh# reboot optional./02-base-tools.sh./04-vcf-cli-install.sh./03-supervisor-ca.sh# source /etc/profile.d/vcf-ca.sh # or open new shell./05-vcf-context-and-plugins.sh./06-harbor-and-test.sh
00-config.sh
This is where you change the settings for hostname, ip, mask, gw,dns and ntp for your lab environment.This is the base config, the other scripts will read from this.
#!/usr/bin/env bash# Edit ONLY this file.# Persistent working directoryexport BOOTSTRAP_DIR="/root/bootstrap"# Host / networkexport HOSTNAME_FQDN="sv01-mgmt01.vcf.local"export MGMT_IFACE="eth0"export MGMT_IP="10.0.x.x"export MGMT_PREFIX="24"export MGMT_GW="10.0.x.x"# DNSexport DNS1="10.0.x.x"export DNS2=""export SEARCH_DOMAIN="vcf.local"# NTP (space separated if multiple)export NTP_SERVERS="10.0.x.x"# Binary install direxport BIN_DIR="/usr/local/bin"# kubectl version: "stable" or pin, for example "v1.30.5"export KUBECTL_VERSION="v1.30.5"# VCF CLIexport VCF_TARBALL="${BOOTSTRAP_DIR}/vcf-cli.tar.gz"export SUPERVISOR_ENDPOINT="sv01.vcf.local"export VCF_CONTEXT_NAME="vcflab01"export VCF_SSO_USER="administrator@vsphere.local"# Harborexport HARBOR_FQDN="harbor.vcf.local"export HARBOR_PROJECT="tkg"export HARBOR_ROBOT_USER='robot$tkg+tkg-pull'export HARBOR_ROBOT_PASSWORD="CHANGE_ME"# Use temporary /etc/hosts entry if DNS is not readyexport USE_ETC_HOSTS_FALLBACK="false"export HARBOR_LB_IP="10.x.x.x"# Kubernetes namespaces / contextsexport NS_TKG="svc-tkg-domain-c10"export NS_CONTOUR="svc-contour-domain-c10"export NS_HARBOR="svc-harbor-domain-c10"
01-network-hostname-ntp.sh
This is the network and ntp:
- Persists files in /root/bootstrap
- Configures systemd-networkd static IP
- Installs/configures chrony NTP
#!/usr/bin/env bashset -Eeuo pipefailsource /root/bootstrap/00-config.shlog(){ echo "[INFO] $*"; }die(){ echo "[ERROR] $*" >&2; exit 1; }[[ "${EUID}" -eq 0 ]] || die "Run as root."mkdir -p "$BOOTSTRAP_DIR"chmod 700 "$BOOTSTRAP_DIR"PHOTON_DHCP_FILE="/etc/systemd/network/99-dhcp-en.network"STATIC_FILE="/etc/systemd/network/99-static-${MGMT_IFACE}.network"log "Setting hostname to ${HOSTNAME_FQDN}"hostnamectl set-hostname "${HOSTNAME_FQDN}"if [[ -f "$PHOTON_DHCP_FILE" ]]; then ts="$(date +%F_%H%M%S)" log "Archiving default DHCP file ${PHOTON_DHCP_FILE} -> ${PHOTON_DHCP_FILE}.bak.${ts}" mv -f "$PHOTON_DHCP_FILE" "${PHOTON_DHCP_FILE}.bak.${ts}"else log "No default DHCP file ${PHOTON_DHCP_FILE} found (ok)."fishopt -s nullglobfor f in /etc/systemd/network/*.network; do [[ "$f" == "$STATIC_FILE" ]] && continue if grep -qE "^\s*Name=${MGMT_IFACE}\s*$" "$f" 2>/dev/null; then ts="$(date +%F_%H%M%S)" log "Archiving conflicting file $f -> ${f}.bak.${ts}" mv -f "$f" "${f}.bak.${ts}" fidoneshopt -u nullgloblog "Writing static network config to ${STATIC_FILE}"{ echo "[Match]" echo "Name=${MGMT_IFACE}" echo echo "[Network]" echo "Address=${MGMT_IP}/${MGMT_PREFIX}" echo "Gateway=${MGMT_GW}" echo "DNS=${DNS1}" [[ -n "$DNS2" ]] && echo "DNS=${DNS2}" [[ -n "$SEARCH_DOMAIN" ]] && echo "Domains=${SEARCH_DOMAIN}"} > "$STATIC_FILE"chmod 0644 "$STATIC_FILE"systemctl enable systemd-networkd >/dev/null 2>&1 || truesystemctl restart systemd-networkd || truesleep 2ip -br a show "$MGMT_IFACE" || trueip r | sed -n '1,20p' || truelog "Installing/configuring chrony"tdnf makecache -y >/dev/null || truetdnf install -y chrony >/dev/null || trueif [[ -f /etc/chrony.conf ]]; then cp -a /etc/chrony.conf "/etc/chrony.conf.bak.$(date +%F_%H%M%S)" 2>/dev/null || true { echo "# Managed by 01-network-hostname-ntp.sh" for s in $NTP_SERVERS; do echo "server ${s} iburst" done echo "driftfile /var/lib/chrony/drift" echo "makestep 1.0 3" echo "rtcsync" } > /etc/chrony.conf systemctl enable chronyd >/dev/null 2>&1 || true systemctl restart chronyd >/dev/null 2>&1 || truefichronyc sources -v || truelog "01 done. Reboot is optional."
02-base-tools.sh
Installs common tools you’ll need.
#!/usr/bin/env bashset -Eeuo pipefailsource /root/bootstrap/00-config.shlog(){ echo "[INFO] $*"; }die(){ echo "[ERROR] $*" >&2; exit 1; }[[ "${EUID}" -eq 0 ]] || die "Run as root."log "Installing base tools"tdnf makecache -y >/dev/null || truetdnf install -y curl jq tar gzip unzip ca-certificates openssl docker >/dev/null || truelog "Enabling docker"systemctl enable docker >/dev/null 2>&1 || truesystemctl start docker >/dev/null 2>&1 || trueif [[ "$KUBECTL_VERSION" == "stable" ]]; then ver="$(curl -fsSL https://dl.k8s.io/release/stable.txt)"else ver="$KUBECTL_VERSION"figetent hosts dl.k8s.io >/dev/null 2>&1 || die "DNS cannot resolve dl.k8s.io. Fix DNS first."mkdir -p "$BIN_DIR"url="https://dl.k8s.io/release/${ver}/bin/linux/amd64/kubectl"log "Downloading kubectl ${ver} -> ${BIN_DIR}/kubectl"curl -fsSL "$url" -o "${BIN_DIR}/kubectl"chmod 0755 "${BIN_DIR}/kubectl"kubectl version --client || die "kubectl failed after install"docker version || truelog "02 done."
03-supervisor-ca.sh
This step fixes the Supervisor x509 unknown authority in a Photon-minimal:
- Exports SSL_CERT_FILE and CURL_CA_BUNDLE via /etc/profile.d/vcf-ca.sh
- It extracts the server chain with openssl s_client
- Appends it to a custom bundle /etc/pki/tls/certs/ca-bundle.custom.crt
#!/usr/bin/env bashset -Eeuo pipefailsource /root/bootstrap/00-config.shlog(){ echo "[INFO] $*"; }die(){ echo "[ERROR] $*" >&2; exit 1; }[[ "${EUID}" -eq 0 ]] || die "Run as root."tdnf makecache -y >/dev/null || truetdnf install -y openssl ca-certificates curl >/dev/null || trueCA_DIR="${BOOTSTRAP_DIR}/certs"CUSTOM_BUNDLE="/etc/pki/tls/certs/ca-bundle.custom.crt"PROFILED="/etc/profile.d/vcf-ca.sh"mkdir -p "$CA_DIR"log "Fetching TLS chain from ${SUPERVISOR_ENDPOINT}:443"openssl s_client -showcerts -connect "${SUPERVISOR_ENDPOINT}:443" -servername "${SUPERVISOR_ENDPOINT}" </dev/null 2>/dev/null \ | awk ' /BEGIN CERTIFICATE/ {i++; fn=sprintf("'"${CA_DIR}"'/cert-%d.crt", i)} {if (i>0) print > fn} 'ls -l "${CA_DIR}"/cert-*.crt >/dev/null 2>&1 || die "No certificates extracted from Supervisor."log "Building custom CA bundle at ${CUSTOM_BUNDLE}"if [[ -f /etc/pki/ca-trust/extracted/pem/tls-ca-bundle.pem ]]; then cat /etc/pki/ca-trust/extracted/pem/tls-ca-bundle.pem "${CA_DIR}"/cert-*.crt > "$CUSTOM_BUNDLE"elif [[ -f /etc/pki/tls/certs/ca-bundle.crt ]]; then cat /etc/pki/tls/certs/ca-bundle.crt "${CA_DIR}"/cert-*.crt > "$CUSTOM_BUNDLE"else die "No base CA bundle found on system."fichmod 0644 "$CUSTOM_BUNDLE"cat > "$PROFILED" <<EOFexport SSL_CERT_FILE="${CUSTOM_BUNDLE}"export CURL_CA_BUNDLE="${CUSTOM_BUNDLE}"EOFchmod 0644 "$PROFILED"export SSL_CERT_FILE="${CUSTOM_BUNDLE}"export CURL_CA_BUNDLE="${CUSTOM_BUNDLE}"log "Testing Supervisor TLS"curl -fsS "https://${SUPERVISOR_ENDPOINT}/" >/dev/null || die "Supervisor TLS verification still failing."log "03 done. Open a new shell or run: source ${PROFILED}"
04-vcf-cli-install.sh
Installs vcf-cli and puts it in /usr/local/bin.
#!/usr/bin/env bashset -Eeuo pipefailsource /root/bootstrap/00-config.shlog(){ echo "[INFO] $*"; }die(){ echo "[ERROR] $*" >&2; exit 1; }[[ "${EUID}" -eq 0 ]] || die "Run as root."tdnf makecache -y >/dev/null || truetdnf install -y tar gzip ca-certificates curl >/dev/null || trueif command -v vcf >/dev/null 2>&1; then log "vcf already installed: $(command -v vcf)" exit 0fi[[ -f "$VCF_TARBALL" ]] || die "Missing $VCF_TARBALL"tmpdir="$(mktemp -d /tmp/vcfcli.XXXXXX)"tar -xzf "$VCF_TARBALL" -C "$tmpdir"candidate=""if [[ -f "${tmpdir}/vcf-cli-linux_amd64" ]]; then candidate="${tmpdir}/vcf-cli-linux_amd64"else candidate="$(find "$tmpdir" -maxdepth 2 -type f -name "vcf*" | head -n 1 || true)"fi[[ -n "$candidate" ]] || die "Could not locate vcf binary inside tarball."install -m 0755 "$candidate" "${BIN_DIR}/vcf"rm -rf "$tmpdir"log "Installed vcf -> ${BIN_DIR}/vcf"vcf version || truelog "04 done."
05-vcf-context-and-plugins.sh (manual login step)
This step is intentionally interactive (because automating the prompt has been flaky and caused hangs/crashes).
It will:
- activate context to trigger plugin installation
- verify Supervisor TLS works
- run the exact commands manually
#!/usr/bin/env bashset -Eeuo pipefailsource /root/bootstrap/00-config.shlog(){ echo "[INFO] $*"; }die(){ echo "[ERROR] $*" >&2; exit 1; }command -v vcf >/dev/null 2>&1 || die "vcf not found. Run 04-vcf-cli-install.sh first."if [[ -f /etc/profile.d/vcf-ca.sh ]]; then # shellcheck disable=SC1091 source /etc/profile.d/vcf-ca.shfilog "Testing Supervisor TLS before context creation"curl -fsS "https://${SUPERVISOR_ENDPOINT}/" >/dev/null || die "Supervisor TLS still failing. Run 03-supervisor-ca.sh first."cat <<EOF[MANUAL STEP REQUIRED]Run this command: vcf context create --endpoint=${SUPERVISOR_ENDPOINT}When prompted, enter: Provide a name for the context: ${VCF_CONTEXT_NAME} Provide Username: ${VCF_SSO_USER} Provide Password: <type it>Then run: vcf context use ${VCF_CONTEXT_NAME}That step installs recommended plugins.Verify with: vcf context list --wideEOFread -rp "Press ENTER when you are ready to run 'vcf context create'..."vcf context create --endpoint="${SUPERVISOR_ENDPOINT}"read -rp "Press ENTER to run 'vcf context use ${VCF_CONTEXT_NAME}'..."vcf context use "${VCF_CONTEXT_NAME}"vcf context list --wide || truelog "05 done."
06-harbor-and-test.sh
This step assumes:
- You already ran step 05 so plugins exist
- DNS for harbor.vcf.local works OR you set USE_ETC_HOSTS_FALLBACK=true
- You already have a robot account/password
- It will:
- ensure docker login works
- push busybox into Harbor project
- deploy a test pod from Harbor using the svc-tkg context (via vcf kubectl wrapper)
#!/usr/bin/env bashset -Eeuo pipefailsource /root/bootstrap/00-config.shlog(){ echo "[INFO] $*"; }warn(){ echo "[WARN] $*" >&2; }die(){ echo "[ERROR] $*" >&2; exit 1; }[[ "${EUID}" -eq 0 ]] || die "Run as root."command -v kubectl >/dev/null 2>&1 || die "kubectl not found. Run 02-base-tools.sh first."command -v docker >/dev/null 2>&1 || die "docker not found. Run 02-base-tools.sh first."command -v curl >/dev/null 2>&1 || die "curl not found. Run 02-base-tools.sh first."if [[ -f /etc/profile.d/vcf-ca.sh ]]; then # shellcheck disable=SC1091 source /etc/profile.d/vcf-ca.shfiCUSTOM_BUNDLE="/etc/pki/tls/certs/ca-bundle.custom.crt"TMP_CA="${BOOTSTRAP_DIR}/harbor-ca.crt"get_contour_lb_ip() { kubectl --context "${VCF_CONTEXT_NAME}:${NS_CONTOUR}" -n "${NS_CONTOUR}" get svc envoy -o wide 2>/dev/null \ | awk 'NR==2{print $5}'}ensure_harbor_resolution() { if getent hosts "${HARBOR_FQDN}" >/dev/null 2>&1; then log "${HARBOR_FQDN} already resolves" return fi if [[ "${USE_ETC_HOSTS_FALLBACK}" == "true" ]]; then local ip="${HARBOR_LB_IP}" [[ -n "$ip" ]] || ip="$(get_contour_lb_ip || true)" [[ -n "$ip" ]] || die "Could not determine Harbor LB IP." echo "${ip} ${HARBOR_FQDN}" >> /etc/hosts log "Added /etc/hosts entry: ${ip} ${HARBOR_FQDN}" else die "DNS does not resolve ${HARBOR_FQDN}. Fix DNS or set USE_ETC_HOSTS_FALLBACK=true." fi}install_harbor_ca() { log "Downloading Harbor CA" curl -kfsSL "https://${HARBOR_FQDN}/api/v2.0/systeminfo/getcert" -o "$TMP_CA" [[ -s "$TMP_CA" ]] || die "Harbor CA download failed." touch "$CUSTOM_BUNDLE" chmod 0644 "$CUSTOM_BUNDLE" log "Appending Harbor CA to ${CUSTOM_BUNDLE}" cat "$TMP_CA" >> "$CUSTOM_BUNDLE" echo >> "$CUSTOM_BUNDLE" export SSL_CERT_FILE="$CUSTOM_BUNDLE" export CURL_CA_BUNDLE="$CUSTOM_BUNDLE" # 401 Unauthorized is expected before login. local status status="$(curl -sS -o /dev/null -w '%{http_code}' "https://${HARBOR_FQDN}/v2/")" || die "Harbor connectivity/TLS failed." if [[ "$status" != "200" && "$status" != "401" ]]; then die "Unexpected Harbor /v2/ HTTP status: $status" fi log "Harbor TLS verification OK (HTTP $status from /v2/ is acceptable)"}docker_login_and_push_busybox() { log "Docker login to Harbor" echo "$HARBOR_ROBOT_PASSWORD" | docker login "$HARBOR_FQDN" -u "$HARBOR_ROBOT_USER" --password-stdin log "Push/pull busybox" docker pull busybox:latest docker tag busybox:latest "${HARBOR_FQDN}/${HARBOR_PROJECT}/busybox:latest" docker push "${HARBOR_FQDN}/${HARBOR_PROJECT}/busybox:latest" docker rmi "${HARBOR_FQDN}/${HARBOR_PROJECT}/busybox:latest" >/dev/null 2>&1 || true docker pull "${HARBOR_FQDN}/${HARBOR_PROJECT}/busybox:latest"}create_pull_secret_and_test_pod() { local ctx="${VCF_CONTEXT_NAME}:${NS_TKG}" local pod_name="harbor-test-02" log "Creating imagePull secret" kubectl --context "$ctx" -n "$NS_TKG" delete secret harbor-tkg-pull --ignore-not-found kubectl --context "$ctx" -n "$NS_TKG" create secret docker-registry harbor-tkg-pull \ --docker-server="$HARBOR_FQDN" \ --docker-username="$HARBOR_ROBOT_USER" \ --docker-password="$HARBOR_ROBOT_PASSWORD" \ --docker-email="unused@local" log "Patching default ServiceAccount" kubectl --context "$ctx" -n "$NS_TKG" patch serviceaccount default \ --type=merge -p '{"imagePullSecrets":[{"name":"harbor-tkg-pull"}]}' log "Running Harbor test pod: ${pod_name}" kubectl --context "$ctx" -n "$NS_TKG" delete pod "${pod_name}" --ignore-not-found kubectl --context "$ctx" -n "$NS_TKG" run "${pod_name}" \ --image="${HARBOR_FQDN}/${HARBOR_PROJECT}/busybox:latest" \ --restart=Never --command -- sh -c "echo OK-from-harbor; sleep 5" sleep 4 kubectl --context "$ctx" -n "$NS_TKG" get pod "${pod_name}" -o wide || true kubectl --context "$ctx" -n "$NS_TKG" logs "${pod_name}" || true}main() { ensure_harbor_resolution install_harbor_ca docker_login_and_push_busybox create_pull_secret_and_test_pod log "06 done."}main "$@"
This step focuses only on validating Harbor access, pushing a test image, and confirming that Kubernetes can pull images from the registry. Application deployment is handled separately in the next step.
In my testing phase i took a snapshot of the vm before running each script so that i had an easy rollback if something went wrong.
Next is to test application deployment from Harbor.
What the script does:
The 07-tetris.sh script performs the following actions:
- Prints the assigned IP together with the requested FQDN.
- Verifies that the target namespace exists.
- Deploys the Tetris application from Harbor.
- Creates a separate Kubernetes Service of type LoadBalancer.
- Waits for the deployment to become ready.
- Waits for the platform to assign an external LoadBalancer IP.
#!/usr/bin/env bashset -Eeuo pipefailsource /root/bootstrap/00-config.shlog(){ echo "[INFO] $*"; }warn(){ echo "[WARN] $*" >&2; }die(){ echo "[ERROR] $*" >&2; exit 1; }[[ "${EUID}" -eq 0 ]] || die "Run as root."command -v kubectl >/dev/null 2>&1 || die "kubectl not found. Run 02-base-tools.sh first."command -v getent >/dev/null 2>&1 || die "getent not found."# Tetris-specific variablesTETRIS_NAME="${TETRIS_NAME:-tetris}"TETRIS_NAMESPACE="${TETRIS_NAMESPACE:-$NS_TKG}"TETRIS_IMAGE="${TETRIS_IMAGE:-${HARBOR_FQDN}/${HARBOR_PROJECT}/tetris:latest}"TETRIS_FQDN="${TETRIS_FQDN:-tetris.vcf.local}"# Optional:# Leave empty to let Kubernetes/NSX assign an IP automatically.# Set this only if you want to request a specific IP from the LB pool.TETRIS_LB_IP="${TETRIS_LB_IP:-}"ctx="${VCF_CONTEXT_NAME}:${TETRIS_NAMESPACE}"ensure_namespace_exists() { kubectl --context "$ctx" -n "$TETRIS_NAMESPACE" get ns "$TETRIS_NAMESPACE" >/dev/null 2>&1 \ || die "Namespace ${TETRIS_NAMESPACE} not found."}show_input_values() { log "Using values:" echo " TETRIS_NAME = ${TETRIS_NAME}" echo " TETRIS_NAMESPACE = ${TETRIS_NAMESPACE}" echo " TETRIS_IMAGE = ${TETRIS_IMAGE}" echo " TETRIS_FQDN = ${TETRIS_FQDN}" if [[ -n "${TETRIS_LB_IP}" ]]; then echo " TETRIS_LB_IP = ${TETRIS_LB_IP}" else echo " TETRIS_LB_IP = <auto-assigned>" fi}deploy_tetris() { log "Deploying ${TETRIS_NAME} into namespace ${TETRIS_NAMESPACE}" if [[ -n "${TETRIS_LB_IP}" ]]; then cat <<YAML | kubectl --context "$ctx" -n "$TETRIS_NAMESPACE" apply -f -apiVersion: apps/v1kind: Deploymentmetadata: name: ${TETRIS_NAME}spec: replicas: 1 selector: matchLabels: app: ${TETRIS_NAME} template: metadata: labels: app: ${TETRIS_NAME} spec: containers: - name: ${TETRIS_NAME} image: ${TETRIS_IMAGE} imagePullPolicy: Always ports: - containerPort: 80---apiVersion: v1kind: Servicemetadata: name: ${TETRIS_NAME}-lbspec: type: LoadBalancer loadBalancerIP: ${TETRIS_LB_IP} selector: app: ${TETRIS_NAME} ports: - port: 80 targetPort: 80YAML else cat <<YAML | kubectl --context "$ctx" -n "$TETRIS_NAMESPACE" apply -f -apiVersion: apps/v1kind: Deploymentmetadata: name: ${TETRIS_NAME}spec: replicas: 1 selector: matchLabels: app: ${TETRIS_NAME} template: metadata: labels: app: ${TETRIS_NAME} spec: containers: - name: ${TETRIS_NAME} image: ${TETRIS_IMAGE} imagePullPolicy: Always ports: - containerPort: 80---apiVersion: v1kind: Servicemetadata: name: ${TETRIS_NAME}-lbspec: type: LoadBalancer selector: app: ${TETRIS_NAME} ports: - port: 80 targetPort: 80YAML fi}wait_for_rollout() { log "Waiting for deployment rollout" kubectl --context "$ctx" -n "$TETRIS_NAMESPACE" rollout status deploy/"${TETRIS_NAME}" --timeout=180s}get_tetris_lb_ip() { kubectl --context "$ctx" -n "$TETRIS_NAMESPACE" get svc "${TETRIS_NAME}-lb" \ -o jsonpath='{.status.loadBalancer.ingress[0].ip}' 2>/dev/null || true}wait_for_tetris_lb_ip() { log "Waiting for LoadBalancer IP for ${TETRIS_NAME}-lb" local lb_ip="" local max_tries=36 local i for i in $(seq 1 "$max_tries"); do lb_ip="$(get_tetris_lb_ip)" if [[ -n "${lb_ip}" ]]; then echo "${lb_ip}" return 0 fi sleep 5 done return 1}show_tetris_status() { log "Current Tetris objects" kubectl --context "$ctx" -n "$TETRIS_NAMESPACE" get deploy,pod,svc | egrep "NAME|${TETRIS_NAME}" || true}print_next_steps() { local lb_ip lb_ip="$(wait_for_tetris_lb_ip || true)" echo echo "========================================" echo "Tetris deployment completed" echo "========================================" if [[ -n "${lb_ip}" ]]; then echo "Assigned LoadBalancer IP : ${lb_ip}" echo "Requested FQDN : ${TETRIS_FQDN}" echo echo "Create this DNS record:" echo " ${TETRIS_FQDN} -> ${lb_ip}" echo echo "You can also test directly by IP first:" echo " curl http://${lb_ip}" echo echo "After DNS is created, test with:" echo " curl http://${TETRIS_FQDN}" else warn "No LoadBalancer IP assigned yet." echo echo "Check again with:" echo " kubectl --context \"$ctx\" -n \"$TETRIS_NAMESPACE\" get svc ${TETRIS_NAME}-lb -o wide" echo echo "Once the IP appears, create this DNS record:" echo " ${TETRIS_FQDN} -> <assigned-lb-ip>" fi}main() { ensure_namespace_exists show_input_values deploy_tetris wait_for_rollout show_tetris_status print_next_steps log "07 done."}main "$@"
At the end of the script, the output looks similar to this:
Example output
Assigned LoadBalancer IP : 10.33.128.x
Requested FQDN : tetris.vcf.local
Create this DNS record:
tetris.vcf.local -> 10.33.128.x
If your deployment of Tetris went fine you should be able to see this:
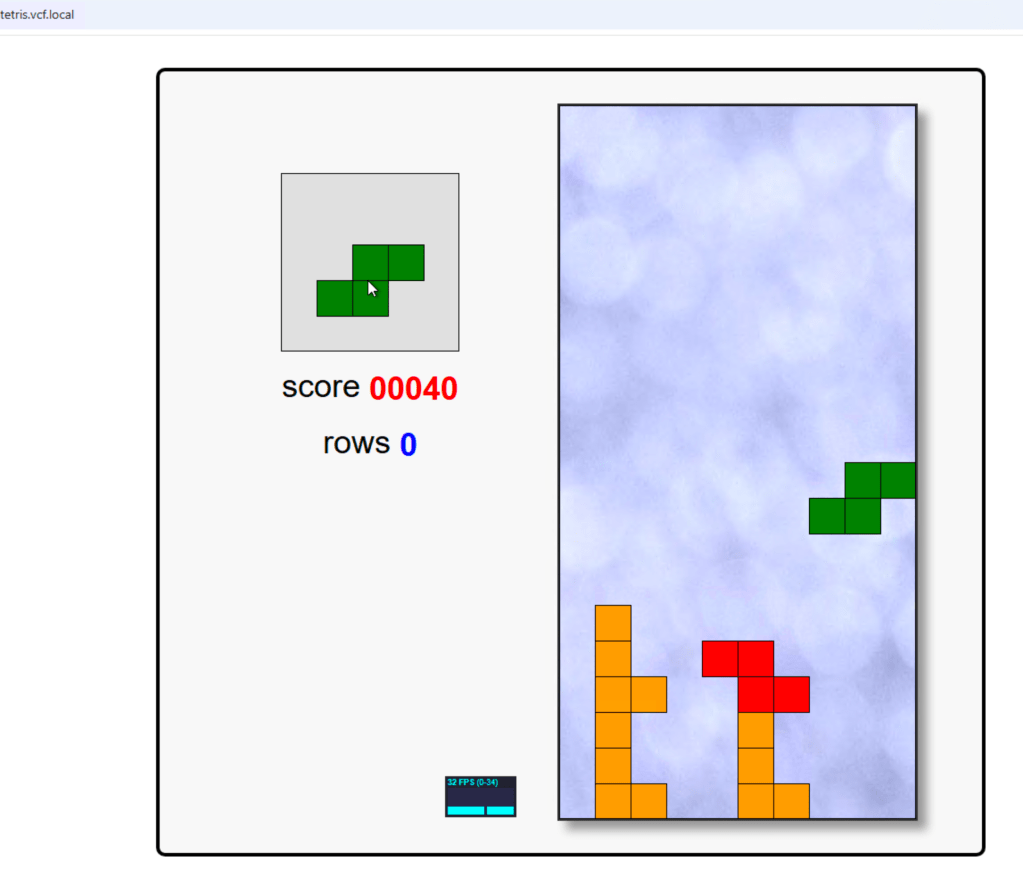
Enjoy!
Next post we create something a bit more useful like a 2 tier application.

Leave a comment